- Very healthy recipes from the kitchen to the table in minutes

Every time I make kootu (which I make most often), I usually follow the simple recipe and I substitute it with different veggies. This eve...

Every time I make kootu (which I make most often), I usually follow the simple recipe and I substitute it with different veggies. This evening, I wanted to try Mrs. Saraswathi Viswanthan's recipe and try adding a powder to the kootu mix. I like it because, it not only acts as a thickening agent but also gives a texture to the kootu which I like. This is a powder that can be prepared and stored in a bottle. When needed this podi can be added to the kootu in the end. Sometimes, its nice to taste something different. Next time you are in the mood to make some kootu try adding this podia/powder in the end.


Gadgets:

Wok
Spatula
Measuring Cups and Spoons
Blender

Ingredients:

Udad Dal - 1 cup
Channa Dal - 3/4 cup
Black Pepper - 2 tbsp ( add this ingredient as per your taste)
Red Dry Chillies - 2
Cumin Seeds - 2 tbsp
Oil - 1 tsp


Preparation:

1. Heat the wok with some oil. Roast all the ingredients, allow to cool and coarsely powder, then store in a bottle.


Cabbage is a common vegetable found in every country. It is very easy to cook and it also gets done very fast. It is delicious when well c...

Cabbage is a common vegetable found in every country. It is very easy to cook and it also gets done very fast. It is delicious when well cooked and can smell awful and slushy when over cooked. My Amma and my Padhu chithi make it very well.They had a different approach to making them delicious. Padhu Chithi prepared the curry using a pressure cooker and my Amma used the kadai. Over the years I have adapted my own version and I thought it would be great to blog about it. I think cabbage poriyal can easily be passed as a salad with any kind of food especially if they are rice based. One can also improvise by adding udad dal, peas etc.


Gadgets:

Heavy Bottom Wok
Spatula
Measuring spoons
Cutting Board
Knife
Food Processor ( Helps to uniformly shred cabbage)

Ingredients:

Cabbage - 1 whole finely shredded ( please cut them or shred them uniformly, makes all the difference when cooking washed and drained well)
Oil - 1 tsp
Ghee - 1 tsp
Mustard Seeds - 1 tsp
Chilies - ( green or red whichever you may prefer) - 1
Cilantro - 2 tbsps minced
Curry Leaves - a few
Coconut - 3 tbsps ( optional)
Peas (optional)
Salt

Preparation:

1. Heat the heavy bottom wok on high heat. Add oil, ghee, mustard seeds. Allow the mustard seeds to pop and then add chilies and curry leaves. Add cabbage.

2. Mix well and allow the seasoning to coat the cabbage. Allow it to cook well before adding salt. Water will start to ooze when salt is added. Keep mixing the cabbage until the water evaporates. All this will happen in 4 minutes.

3. Garnish with cilantro,curry leaves and coconut and serve it hot.

This weekend was Thiruvathirai Kali and I always enjoy making the kali ( a sweet rice dish made with jaggery) and Thalatha kozambu that g...

This weekend was Thiruvathirai Kali and I always enjoy making the kali ( a sweet rice dish made with jaggery) and Thalatha kozambu that goes with it. I do not know who came up with that combination, but I enjoy it and so does my husband. We look forward to making it every year and enjoy it. It is very simple to prepare and can be made anytime. It resembles a sweet upma. Here is the kali that I enjoyed yesterday. 


Gadgets:

Heavy Bottom Vessel/ Wok
Spatula
Blender
Measuring cups
Saucepan


Ingredients:

Long Grain Rice  - 1 cup
Water - 3 1/2 cups for cooking rice and 1 cup for melting jaggery
Jaggery  - 1 pound
Ghee - a few tbsp
Cashew Nuts - 15
Sliced Almonds - 1/2 cup
Raisins - 1/2 cup
Cardamon - 6 pods
Coconut - 1/4 cup grated


Preparation:

1. In a heavy bottom skillet dry roast the rice until it turns white.

2. Allow it to cook and using the blender make a coarse rice mixture ( one the resembles couscous)

3. Boil 3 1/2 water and once it comes to a rolling boil add a pinch of salt and add the broken rice. Allow it  to boil and then reduce the flame and cooked covered while mixing it a couple of time. The rice must be completely cooked and be transparent.

4. In the meantime heat the saucepan with jaggery and water. Allow the jaggery to melt and filter to remove stones and residue.

5. Add the jaggery liquid to the cooked broken rice. Mix and allow the jaggery to cook into the rice for 10- 15 minutes on low heat.

6. Add ghee to the seasoning wok. Add the raisins, cashew nuts and almonds. Lightly toast and add to the kali.

7. Garnish with cardamon and mix well and serve it hot with thalatha kozhambu.

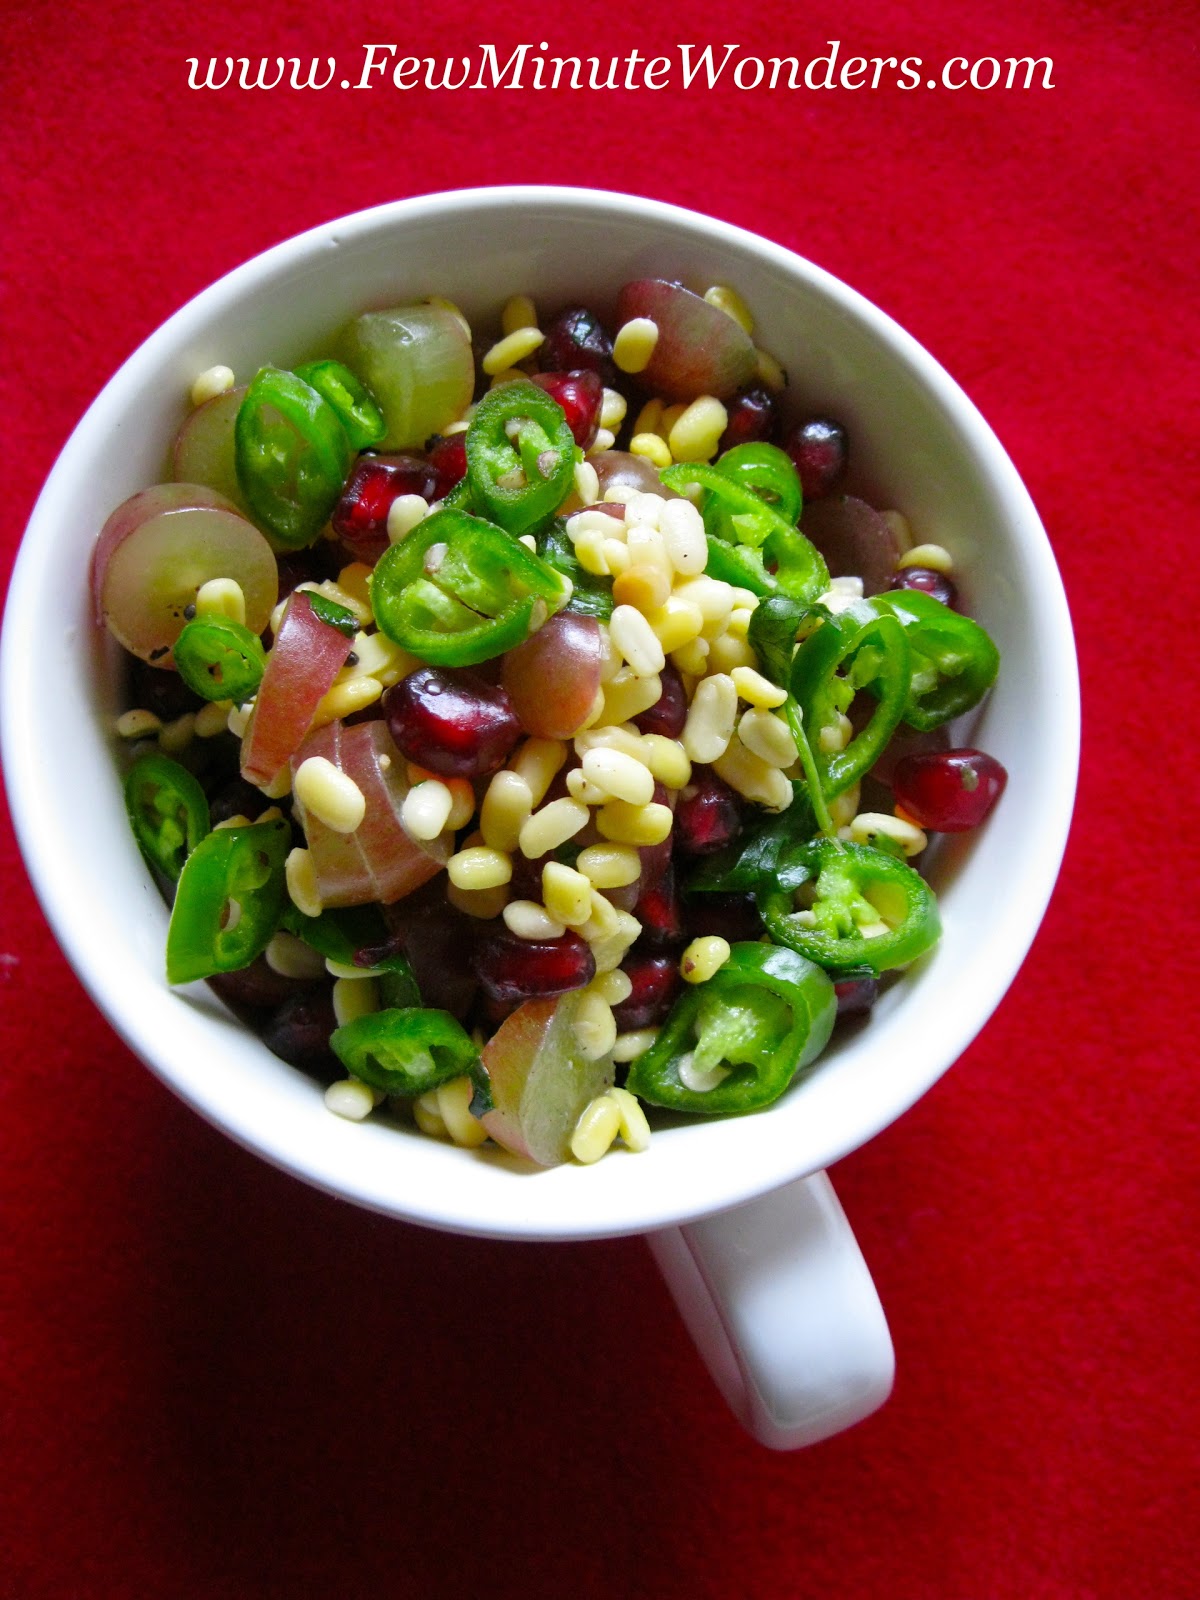
I am sure most of you are aware of kosmalli. Carrot kosmalli is very popular in south Indian cuisine. The fruit kosmalli  is something th...

I am sure most of you are aware of kosmalli. Carrot kosmalli is very popular in south Indian cuisine. The fruit kosmalli  is something that I tried in the last minute and happened to liked it a lot. I just finished a bowl of this salad for lunch and was pleasantly surprised by the lightness and freshness of it that I decided to blog about it. I personally think that simple side dishes get more appreciation and therefore enhances the meal served. Especially when you have last minute guests, this is a perfect salad to prepare and serve with any kind of food in a jiffy. I am a big fan of blending salty, spicy and sweet ingredients in salads. So the next time if you are wondering how to make any meal special, try this one and you will start making it more often. My daughter tells me that the photos look perfect for the holidays.


Gadgets:

Bowls
Cutting Board
Knife
Measuring Cup
Measuring Spoon
Seasoning Ladle or wok
Mixing Spoon
Colander


Ingredients:

Moong Dal- 1/2 cup
Pomogranate - 1/2 cup
Grapes - 1/2 cup sliced
Green Chillies - 1 ( if its too much spice substitute  black pepper powder)
Salt
Lemon Juice - a dash
Mustard Seeds - 1 tsp
Asafoetida - 1 tsp ( optional)
Water - Enough to soak Moong Dal
Oil - 2 tsps
Cilantro or mint - 1 tbsp chopped finely.


Preparation:

1. Soak the Moong dal in hot water for 15 minutes. Drain and set aside.

2. In the meantime mix the fruits in a bowl. 

3. Heat the season wok and add mustard seeds and asafetida. Allow to pop and add to the fruits. 

4. Mix the moong dal and fruits mixture. Add a dash of lemon and season with salt. 

5. Add black pepper powder or slices of green chillies and garnish with cilantro. Serve on the side with any kind of food.


These days my husband and I shop regularly at the farmers market. With a little help we have understood what we need to buy and from whom ...

These days my husband and I shop regularly at the farmers market. With a little help we have understood what we need to buy and from whom to buy. The local vendors are so friendly and are getting familiar with us. I cannot go past a bunch of teenagers who sell organic produce from their parents farm. They have such good swiss chard and I grab a bunch or two from them to prepare chard the south Indian way. My daughter thinks it is very cool because it is all pink and tastes yummy. As for me, I love making it for her because it takes me less than 10 minutes to make it and tastes so fresh. Perfect side dish alongside some dal and rice for a simple meal.


Gadgets:

Cutting Board
Knife
Wok
Spatula
Measuring Spoons

Ingredients:

Swiss Chard - 1 bunch ( cut into shreds)
Olive Oil - 2 tsp
Mustard Seeds - 1 tsp
Udad Dal - 2 tsp
Coconut -2 tbsp
Dry Red Chilies - 2
Salt
Asafoetida - 1/4 tsp


Preparation:

1. Heat the wok on medium high. Add oil, asafoetida, mustard seeds and allow for it to pop.

2. Add udad dal, red chilies and allow for the dal to turn golden brown.

3. Add the Swiss chard that are cut into thin shreds and toss it well.

4. Allow it to cook for a few minutes. It will start to wilt and reduce in quantity. Add salt and coconut to it. Toss and serve hot on the side with some rice and dal. 

I am yet to meet a person who can pass on garlic sticks. Its sometime difficult to find or make garlic bread when we need it. This is my g...

I am yet to meet a person who can pass on garlic sticks. Its sometime difficult to find or make garlic bread when we need it. This is my go to garlic bread that I usually make for an after school snack, to serve with soup, movie snack or when unexpected guests arrive. Its a huge hit among the kids and it disappears fast from the plate. It takes less than 5 minutes to prepare these  garlic bread sticks. Next time when you have an instant craving for garlic bread sticks you can give this one a try.


Gadgets:


Toaster
Measuring spoon
Plate
Knife
Bowl

Ingredients:

Bread Slices -4
Ghee - 1 tsp or Butter - 1 tbsp
Extra Virgin Olive Oil - 3 tbsp
Garlic Powder - a few shakes
Italian Seasoning - a few shakes (optional) or Crushed Peppers
Cheese ( optional , I add it some time )


Preparation:

1. Add the ghee/ butter into a bowl along with the oil. Microwave it until the ghee/ butter melts.

2. Pastry Brush or Spoon the melted oil, ghee/ butter mix over the toasted bread.

3. Sprinkle the garlic powder evenly over the bread. If you want extra spice you can add spicy Italian seasoning or crushed peppers over the garlic powder.

4. Cut the bread slice into sticks or strips  and serve hot. 


Sometimes the weather, time or our moods dictate the food that is prepared in our kitchen. The fall weather is so perfect for a warm cup o...

Sometimes the weather, time or our moods dictate the food that is prepared in our kitchen. The fall weather is so perfect for a warm cup of soup. This is my go to soup especially when I am out of  fresh veggies in my fridge or when I have very little time and have a lot of hungry stomachs to feed. A bag of frozen corn can feed a family of four easily. A very healthy, simple soup that is the most popular among all the kids in my family. I make it so often and sometimes serve it for dinner along with some instant garlic bread. I promise you that once you have tasted this one you would not buy the corn soup at any store. A bag of frozen organic yellow corn from Trader Joe's is all that I used for this recipe. So, next time you are in a mood for some hot soup, give this one a try and you will not be disappointed.


Gadgets:

Pressure pan/ Heavy Bottom Pot
Spatula
Measuring Cups and Spoons
Blender ( Vitamix works the best, but  a normal blender will work too)
Sieve


Ingredients:

Frozen Corn/ Fresh Corn - 16 oz
Water/ Vegetable Broth - 3 cups
Milk ( Regular/Lactaid/Rice/ Cream)- 2 cups
Note: In case of allergies rice milk works fine. If you want to make it rich add some cream. Personally, 2% milk works fine.
Salt
Fresh Ground Black Pepper
Butter -1 tbsp

Preparation:

1. Add corn, water or veggie broth and salt to a pressure cooker and cook it to 3 whistles. Once the pressure releases and allow the liquid to cool. If using a stock pot, add all the ingredients and cook the corn on medium high for 10 minutes or until it is well done and allow to cool a little.

2. Transfer to a blender and make a smooth puree. If you own a vita mix just blend into a smooth puree and add it back into the pan/ pot. If using a regular blender, pass through a sieve to remove the corn husk and then add to the pan/pot.

3. Add milk, pepper and butter. Allow to come to a boil and serve hot with garlic bread.


A few months ago we were very busy getting ready to move. Sorting through things took most of my time and when it was time to put food on ...

A few months ago we were very busy getting ready to move. Sorting through things took most of my time and when it was time to put food on the table, I had no zest to prepare anything elaborate. I made this pressure cooker sambar to go with idli/ dosai/ rice or quinoa often. It was a breeze and I have been making this sambar since. Gone are the days when I made dhal separate and then added it to the veggie mix. This sambar works well with the following veggies: Onions, Bell Pepper, Drum Stick, Carrot, Potato, Egg Plant (these are the veggies that I have used in groups or individually). For those of you who have  new born babies, work or otherwise generally not in the mood to cook, this one might be a saver. It is super easy and produces very delicious sambar every single time. This is what I made for breakfast this morning and served with steaming idli's.


Gadgets:

Pressure Cooker
Measuring Cups and Spoons
Cutting Board
Knife
Spatula


Ingredients:

Onion - 1 medium size
Tomato - 1 wine ripe ( can use any kind)
Red Bell Pepper - 1
Curry Leaves -  a few
Cilantro - 2 tbsp choped
Oil - 2 tsp
Mustard Seeds - 1 1/2 tsp
Methi Seeds - 1/2 tsp
Asafoetida - 1/2 tsp
Turmeric Powder - 1/2 tsp
Sambar Powder - 1 1/2 tsp ( add as per your taste)
Red Chillies - 1
Toor Dhal - 3/4 cup ( Tastes good with Moong Dhal too)
Water - 3 cups ( makes a thicker sambar)
Salt
Jaggery - a small bit

Preparation:


1. Heat your pressure cooker/ pan on medium high.

2. Prepare the veggies by cutting them into bigger chunks.

3. Add oil, asafoetida, mustard seeds, red chilies, methi seeds and when the mustard starts to pop add all the veggies and the curry leaves and give it a toss. Allow it to all cook for 2 minutes.


4. Add salt, turmeric powder, sambar powder and mix well. Allow it to blend well for 1 minute.

5. Add Toor dhal and mix it with the veggies and then add water. Cover and pressure cook on medium high for one whistle and then lower the heat to low and allow it to cook for 2 more whistles.Turn off the stove and remove the pressure pan from the stove.


6. Wait for the pressure to release. Open and mix gently the dhal and veggies ones.Add jaggery and mix. If you think it is thicker than you would like add 1/2 cup of water and mix well.


7. Garnish with cilantro and serve hot with idli, dosai, rice or quinoa.


Lentil crepes or Adai is very popular tiffin in South India. In my family we have a special attachment to adai because of our uncle. My un...

Lentil crepes or Adai is very popular tiffin in South India. In my family we have a special attachment to adai because of our uncle. My uncle Thaigu mama used to visit us every karthigai deepam just to enjoy adai. He loved it so much with rasam. For years I have been making adai varying the dal proportions. The recipe that is posted here is from Vimala who cooks for Amma on and off. Something interesting about her recipe is that it reminds me of Tirupathi Vadai or Adai. It gets its spice from black pepper and ginger and hence there is so much of flavor in it. It warms up your body on a cold winters night or when it is pouring cats and dogs. Usually, it is enjoyed with Aviyal butter, rasam, jaggery or with yogurt rice. Next time you are in a mood for some adai try Vimala's adai, I am sure you will not be disappointed.


Gadgets:

Mixer or Grinder
Measuring Cups and Spoons
Colander
Iron Tava or Griddle
Spatula
Oil


Ingredients:

Makes 7 Cups of Batter

Par Boiled Rice - 1 cup
Long Grain Rice - 1 cup
Channa Dal- 1/2 cup
Thoor Dal - 1/2 cup
Moong Dal - 1 tbsp
Udad Dal with skin - 1 tbsp
Ginger - 2 inches
Black pepper - 2 tbsp ( will be lightly spicy)
Dry Red Chili - 3 to 4
Cilantro - 1/2 cup
Asafoetida - 1/2 tsp
Turmeric Powder - 1/2 tsp
Salt
Water
Curry Leaves- a few strands
Oil - a few tbsps


Preparation:

1. Add all the grains and dal into a colander and rinse it well in  running water, transfer to the blender along with ginger, pepper, curry leaves, chili's and water and soak. The water must be about 1 to 2 inches above the level of the soaked ingredients. Soak it for 1 1/2 hours.

2. Add salt, asafoetida, cilantro and turmeric powder. Blend it to  a consistency that works for your family. Smooth or lightly coarse.

4. Heat the iron tava on medium high. Add half tsp of oil to it and then 1 tbsp of batter. Allow it to cook until  the sides starts to turn light brown. Flip over the mini adai and cook it on the other side. This step helps in uniformly heating the tava and helps in making perfect adai's.


5. Add a ladle of the adai batter on the tava. Spread the adai like a dosai / crepes and add 1/2 tsp oil around it.When it starts to get light brown and crisp around the edges, flip it over and cook for a few minutes and serve it hot with some butter, jaggery or aviyal.


Happy Deepavali  Every Deepavali, I always try to push myself to make a new sweet or savory recipe that I have never made befo...

Happy Deepavali 


Every Deepavali, I always try to push myself to make a new sweet or savory recipe that I have never made before. This year I decided to make kala jamun. To most people it is very simple process to make gulab jamun or kala jamun but not for me.  I have tried making gulab jamun in the past year and tried out a bunch of recipes. I could not get close to what I wanted without the use of koya. I would always have some issues with the taste or the appearance. This Deepavali, I wanted to make kala jamun and with the input from Madhavi (my sister's friend), I was able to use a different ingredient and come up with some tasty kala jamuns. It was simple in the end and got a lot of approval from friends and family. Next time if you want to make kala jamuns for a party or celebrations you can rest assured that this one will work. I started making one portion and was amazed at my results that I decided to make 3 portions of the same recipe to share with my family. Allow them to soak in the syrup, cool and refrigerate them before serving. 


Gadgets:

Measuring cups and spoons
Bowl
Wok
Ladle
Heavy bottom pan


Ingredients: ( Makes 15 Kala Jamuns)

Milk Mava Powder - 1 cup (available at the local Indian store)
Self Raising Flour - 2 tbsp ( note: If you cannot find self raising flour add 1 and 1/2 tsp baking powder to 1 cup of all purpose flour/maida, mix and keep)
Rava/Cream of Wheat - 1 tbsp
Sugar - 2 tsp 
Ghee - 2 tsp
Ricotta Cheese - 2 tbsp
Milk - 2 tbsp
Saffron - 1 pinch
Elachi/Cardamon - 4 pods
Rose Water - a few drops (optional)

For Syrup:

Sugar - 2 cups
Water - 3 cups


Preparation:

1. In a large bowl add mava powder and self raising flour mix well. Add sugar and rava and mix well.

2. Add ghee and mix well, then add ricotta cheese and milk and mix well to form a stiff dough.
3. Heat oil in a wok on medium heat. 

4.Heat a heavy bottom pan with sugar and water. Allow it to melt and then reduce the heat to low.Add saffron, rose water and elachi powder to it.

5. Split the dough into 1 portions and make balls first by pressing one portion between the palms and then allowing it to form a ball.Make sure the surface is smooth and crack free.

6. Drop a small bit of the dough into the oil. It must take its time to rise up to the top. Keep splashing some oil on the kala jamun without touching it. 

7. The kala jamun must be almost black in color.Remove from oil drain and add to sugar syrup. Allow it to soak and then let it sit for a few hours until it absorbs the syrup. Store in a container.

Note: Use the same recipe without sugar in the dough to make Gulab Jamun. 


I am absolutely addicted to this toast ever since I tasted it a few months ago. This is a recipe created by my brother- in-law Shaker. I h...

I am absolutely addicted to this toast ever since I tasted it a few months ago. This is a recipe created by my brother- in-law Shaker. I had no idea as to what he was preparing in the kitchen, but the whole house smelled heavenly. The aroma led me into the kitchen. Taking a peek I found him sauteing jalapenos for his toast. I shamelessly demanded for a toast and he was nice enough to make me one. Spice was something that I expected, but the flavorful and aroma from each bite totally took me by surprise. I loved it so much that I told him that it was going to be blogged. Sometimes I add onions to it but the one posted below is true to the original recipe. This is such a neat snack/treat to a person who enjoys spice. I would totally serve bite size pieces at a party as an appetizer.


Gadgets:

Wok
Spatula
Toaster
Measuring Spoon
Butter Spreader.
Cutting Board
Knife


Ingredients:

Bread - 2 slices ( any kind, I found artisan bread tasted awesome in this recipe)
Jalapeno - 4 sliced
Salt
Butter - 2 tbsp
Oil - 1 tsp


Preparation:

1. Heat the wok. Add oil, allow to warm up and then add the jalapeno slices. Saute it on high for a few minutes. Add some salt and mix well. Remove form heat.

2.Toast 2 slices of bread  and spread the butter on top of it.Arrange the jalapenos on top and have them. (Believe me you will not stop with 2 slices)


Cilantro has been used a lot in Indian and Mexican cuisines. Its one of my favorite herbs and a lot of different recipes are always create...

Cilantro has been used a lot in Indian and Mexican cuisines. Its one of my favorite herbs and a lot of different recipes are always created using cilantro. A very popular cilantro based recipe that belong to a pickle/chutney family is the famous kothamalli urandai ( cilantro mixed spicy balls). It is usually served with yogurt rice. Usually cilantro and lentils along with red chillies and tamarind are pounded in the stone mortar, made into balls and stored for many days. Without the addition of water the mixture stays good for a long time. These days some supermarkets or speciality stores carry them. I just finished the last store bought one and I wanted to have more of it. It can also be spread on a toast and enjoyed for breakfast.


Gadgets:

Blender ( Mixie)
Food Processor
Wok
Spatula
Measuring Cups and Spoons
Cloth/ Tray 


Ingredients:

Organic Fresh Cilantro - 1 bag ( cleaned and washed)
Udad Dhal - 3/4 cup
Channa Dhal - 3/4 cup
Red Dry Chilies - 8
Asafoetida -  dime or 25 pi size piece
Extra Virgin Olive Oil - 3 tbsp for frying  plus  3/4 cup for blending.
Dessicated Coconut - 1/2 cup ( optional)
Salt
Tamarind - 1 lime size


Preparation:

1. Spread the cilantro that is cleaned onto a towel or tray and allow it dry up and be water free.

2. In a wok add oil. Allow it to warm and add asafoetida and allow that to fry well. Then add the dhals and chilies and roast this mixture to golden brown.

3. Add tamarind to the mixture and grind into a coarse powder in the blender. 

4. Add cilantro to the food processor along with the ground powder and blend adding the oil to get it into a pesto like consistency.

5. Store the cilantro pesto in a bottle in the fridge. Spread it on toast  for breakfast or tortilla along with sauteed veggies for lunch.