- Very healthy recipes from the kitchen to the table in minutes

Ever since I was gifted the Ipot, I am enjoying preparing a whole bunch of things with it. Also it is such a blessing to work with. I see t...

Ever since I was gifted the Ipot, I am enjoying preparing a whole bunch of things with it. Also it is such a blessing to work with. I see there is magic happening when you prepare rasam with it. Rasam with rice is the most comforting food for me. There are so many varieties of rasam out there and they are all equally comforting. Pineapple rasam is the one that I prepare often. I love the marriage of sweetness of pineapple, sourness from the tomato and the spices make it a perfect. Here is how I made it using the Ipot. Managed to get a photo before it disappeared.


Gadgets:

Instant Electrical Pressure Cooker
Measuring Cups and Spoons
Blender
Whisk
Seasoning Ladle


Ingredients:

Pineapple -1 cup Puree
Pineapple - 1 cup copped
Tomatoes - 3 Puree
Tomatoes 1 Chopped
Tamarind - small lime size
Rasam Powder -1 tsp
Cumin Powder - 1/2 tsp
Salt
Turmeric Powder - 1/4 tsp
Asafoetida - 1/4 tsp
Dal uncooked 1/2 cup
Pepper Powder - 1/4 tsp
Ghee - 1 Tbsp
Mustard Seeds - 1 Tsp
Cumin seeds- 1/2 tsp
Cilantro - enough for garnish
Water - 2 cups


Preparation:

1. Add pineapple puree, tomato puree,  tamarind juice, dal, rasam powder, cumin, turmeric and
asafoetida powders to the pressure cooker container. Cover and set the ipot on manual at high pressure for 12 minutes.

2. When the ipot beeps turn off the ipot, remove the plug and allow the pressure to release. Using a whisk or hand blender mix the dal with the rasam liquid.

3. Plug the ipot back, add the pineapple and tomato pieces, cilantro.

4. Heat the seasoning ladle with ghee, add mustard seeds, asafoetida powder, cumin and pepper powder. Add to the rasam. Serve them hot.

HAPPY  NEW  YEAR!  A very happy and prosperous new year to everyone. I have been in the kitchen a lot last year but, blogging had not ...

HAPPY  NEW  YEAR! 


A very happy and prosperous new year to everyone. I have been in the kitchen a lot last year but, blogging had not happened. Call it my new year resolution, I hope to blog  regularly this year.  This evening it was raining and the weather was perfect for some crunchy munchies. So I made some instant vadai. I use poha often but this time I used the thick variety which resulted in in the best  textured vadai. After many hours it still stays crunchy so if you are thinking of appetizers for a party please make this and all you may have to do is heat in the microwave and serve. A noteworthy recipe to document and share for the new year.


Gadgets:

Kadai
Slotted Spatula
Bowl
Measuring Cup and Spoon
Cutting Board
Knife


Ingredients:

Thick Poha - 2 cups
Rice Flour - 1/4 cup
Hot water - 3/4 cup or required amount
Organic Onions - 1 cup finely chopped
Curry Leaves - a few
Organic Cilantro - 2 tbsp chopped
Organic Swiss Chard - 1 cup shredded
Salt - to taste
Asafetida - 1/4 tsp powdered
Chilli Powder - 1 1/2 tsp
Ginger - 1 tsp
Oil to deep fry


Preparation:

1. Mix all the above ingredients in a bowl and mix to form a dough. 

2. Heat the oil and make small vadais and fry them. Serve with almond or coconut chutney or Ketchup. 


Hello everyone. I know I have disappeared from the face of the blogging world for many months. I hope all is well in your lives. I had...

Hello everyone. I know I have disappeared from the face of the blogging world for many months. I hope all is well in your lives. I had been out with fever, cold,cough, no sense of smell or taste last week. Everything else was okay for me to handle except cough. As I have mentioned it does not leave me that early. As soon as I started coughing I had a bag of poha next to me and it did help me have some relief. Something better than poha that I had on the recommendation of my sister was no sugar added pineapple juice and crushed pineapple. Seriously, I had not coughed the whole night. After that night I decided that it was something I need to blog and spread the word around.

Why pineapple? It is a known fact that pineapple is rich in Vitamin C, Manganese, Bromelain, which is anti inflammatory. It also dissolves the mucus effectively. It is way better than the cough medicine and if I can get rid of a bad cough in 2 days, I think I will have a lot more of pineapple than the cough syrup.

Pineapple juice has other benefits, if you have stomach issues after eating out some pineapple juice can settle your stomach even if you have ulcer. It helps breastfeeding mothers who have issues blocked milk ducts or engorgement. People with arthritis will benefit because of its anti inflammatory properties. 


Ingredients and Procedure:


Pineapple juice/ Crushed Pineapple (100% juice and not from concentrate, without additional sugar) - 1 cup in room temperature or mixed with warm water. I also had crushed Pineapple in pineapple juice and it worked. 


Note: Places you can find the juices are at Trader Joes, they sell both fresh juice and in cans. Dole brand carries crushed pineapple in pineapple juice, Costco carries Del Monte brand that is 100% pineapple juice. If you cannot find pineapple without additives please make fresh juice from the fruit.


Its simple to make a regular type roti, but sometimes to impress my daughter and get her to have roti I roll it up in interesting ways. Du...

Its simple to make a regular type roti, but sometimes to impress my daughter and get her to have roti I roll it up in interesting ways. During our car travels in India, many a times we used to park the car near a tea kadai (shop) for our driver to get his caffeine fill. Next to the tea kadai there was always a parota making place and I used to watch with great interest at the way they worked the dough, spreading, folding and finally make into balls for making parota. I was talking to my daughter about it and I decided to make the roti rolled the parota way to show her. 

Gadgets:

Rolling Pin
Rolling Board
Tava/Griddle
Spatula


Ingredients:

Whole Wheat Flour Dough - 2 portions
Whole Wheat Flour - Enough to dab for making roti
Ghee - 1 tbsp


Preparation:

1. Take one portion of the dough and dab it with some flour. Roll and spread the dough into a think roti.

2. Spread some ghee over the roti and roll it into a thin rope.

3. Coil the rope into a ball and then roll it out into a circle again. This time make a thick roti.

4. Cook them on the tava on both sides, spread some ghee and serve them hot.


My Krishna Jayanthi celebrations post that I had missed to publish.... It has been a very busy week with Krishna Janmastami celebrati...

My Krishna Jayanthi celebrations post that I had missed to publish....


It has been a very busy week with Krishna Janmastami celebrations. IT always brings fond memories of making snacks with my perima and amma, decorating Krishna with flowers and in the end singing songs all evening. It was a very fun celebration at our home and my sister Sowmya and I always recollect those days. This year for Krishna Jayanthi, I made Poha Halwa, which is a little different from the Avil Kesari that I have posted here. It was very easy to prepare and can be done in under 10 Minutes. It was so perfect with puri and is one of my favorite halwas to prepare.


Gadgets:

Blender
Wok
Spatula
Measuring Cups and Spoons


Ingredients:

Poha/ Avil - 1 cup powdered along with elachi
Elachi/ Cardamom - 3 pods
Ghee -  4 tbsps
Sugar - 3/4 cup
Cashew Nuts - a few
Saffron - a few strands
Milk - 1/2 cup


Preparation:

1. Blend the poha with elachi into a fine powder.

2. Heat the wok with ghee, fry the cashews and set aside. Add the poha in the rest of the ghee and roast well until the aroma surfaces and poha looks roasted.

3. Add sugar and mix well along with milk and saffron.

4. Cook until the sugar blends well. Add the cashew nuts and serve hot with puris.


We made this awesome pavakkai curry a few weeks ago. I always tend to forget the recipe that are mostly experimented.  On high recommendati...

We made this awesome pavakkai curry a few weeks ago. I always tend to forget the recipe that are mostly experimented.  On high recommendations  I decided to make a note of it. I got some bitter gourd from the market to prepare it again this week. Not my favorite kind of vegetable to make, but I kind of liked the crunchy bitter gourd mixed with the onions and tomatoes. Though it does not have any gravy, it still was good enough to pair with rotis.


Gadgets:

Baking Tray
Measuring Cups and Spoons
Wok
Spatula
Cutting Board
Knife
Bowl

Ingredients:

For Chips :

Bitter Gourd - 6 ( I always pick the dark green longer ones)
Salt
Chickpea Flour/ Besan - a cup
Rice Flour - 1 cup
Turmeric - 1/2 tsp
Chili Powder - 1 tsp
Oil - 1 tbsp
Asafoetida Powder - 1/4 tsp
Water - Enough to make a think paste plus 2 cups

For Masala:

Onions - 1 big finely chopped
Tomatoes - 3 firm tomatoes finely chopped
Curry leaves - a few
Cilantro - a tbsp chopped
Garlic - 3 cloves
Ginger - i inch grated
Oil - 1 tbsp
Mustard Seeds - 1/2 tsp
Dry red Chillies - a few
Turmeric Powder - 1/4 tsp
Asafoetida Powder - 1/4 tsp


Preparation:

1. Set the oven to broil. Cut the bitter gourd into thin slices remove the inner seeds. Add salt and set aside for 20 minutes. Remove in a minute rinse in cold water and set for it dry on kitchen towel.

2. Mix the rest of the ingredients for the chips into the bowl. Add the mix well so that bitter gourd is well coated with the besan mix. Place in the baking tray and broil for 12 minutes or less and flip the chips over and broil for 4 minutes or until you get a very crunchy chips.

3. When the bitter gourd is in the oven, heat the wok with oil. Add mustard seeds, asafetida, and allow the mustard to splatter. Add curry leaves, dry chillies and onions along with garlic and ginger.

4. Cook the onions until they are transparent and then add chopped tomatoes, salt, turmeric powder,

5. When the bitter gourd is crisp and crunchy remove and add to the onion mix. Give it a toss, garnish with cilantro and serve.

This recipe was created at one of the sleep overs my nieces and nephews had at our home. They always expect me to make them something exot...

This recipe was created at one of the sleep overs my nieces and nephews had at our home. They always expect me to make them something exotic when they come to stay. Usually I have it all planned as they always are very excited to know what I would make for them. It was almost midnight when they wanted something awesome for dessert. It was summer and I did not want to turn on the oven and get the kitchen hot, so I suggested some cool toppings to go with their ice cream. We had some figs from Trader Joe's and we decided to make something elegant with them. It is not a traditional caramel recipe, but I thought it turned out to be a great hit with the kids. I made them again yesterday and enjoyed them with cottage cheese.


Gadgets:

Saute Pan
Spatula
Cutting Board
Knife
Measuring Spoons


Ingredients:

Butter - 2 tbsps
Brown Sugar - 2 tbsps
Fresh Black Figs - 1 pound cut into four quarters
Fresh Cream or 2% milk - 1/4 cup

Preparation:


1. Heat the sauté pan and add butter. As the butter starts to melt, add brown sugar and mix well. As the butter and sugar comes together, add fresh cream and give it a toss. Add the figs and mix. Allow it to soak some of this butter and sugar. Remove from heat ( make sure not to over cook the fig, just enough to get it lightly warmed up) and serve it over ice cream, cottage cheese, rice pudding etc. 

Sometimes when I shop at Indian stores and find some rare vegetables that my Amma used to make in India, I get super excited. This week ...

Sometimes when I shop at Indian stores and find some rare vegetables that my Amma used to make in India, I get super excited. This week I found some very fresh flat beans at the local Indian store.  I decided to make poriyal/ curry out of it for dinner. The flat beans cooks very fast but prepping it takes some time. Otherwise it is just like cooking any regular south Indian vegetable. Had avaarakai curry with sambar and it was yum.


Gadgets:

Cutting Board
Knife
Saute Pan
Spatula
Colander


Ingredients:

Flat Beans/ Avaarakai - 1 pound
Oil - 1 tbsp
Mustard Seeds - 1 tsp
Udad Dal - 1 tsp
Dry Chillies - 2
Coconut - 1/2 cup
Salt
Curry Leaves - a few

Preparation:

1. Nip the edges of the flat beans. When you nip you will see that a string peals from both the sides of the flat beans, Remove that as they will make the vegetable cook faster. Cut the beans finely, add to colander and give it a good rinse.

2. Heat the sauté pan with oil. Add mustard seeds, let it pop and then add udad dal and dry chillies. When the udad dal gets golden brown, add the flat beans and give it a good toss. Cover and cook for a few mites.

3. Add salt and cook for another 5 minutes covered, It will become very tender. Add the coconut and curry leaves and give it a mix.

4. Serve it as a side dish with any meal. 

For Varalakshmi Nombu, I was rushed for time and could not make the regular medhu vadai for prasadham, instead I made the rice flour vadai...

For Varalakshmi Nombu, I was rushed for time and could not make the regular medhu vadai for prasadham, instead I made the rice flour vadai. I had to make two portions of the recipe as it disappeared very fast. Usually I make it for an afternoon tea and add onions to it, but since it is for prasadham I made it without onions. It tastes delicious and has a crunchy texture when it is hot off the stove. When it cools down, it is still a little crisp and delicious. A simple and gluten free vadai to make anytime. 


Gadgets:

Frying Pan
Slotted Spatula
Measuring Spoons and Cups
Cutting Board
Knife
Bowl


Ingredients:

Rice Flour - 1 cup
Salt
Asafoetida Powder - 1/4 tsp
Ginger Grated - 1 tsp
Curry Leaves - a few
Cilantro Chopped - 2 tbsp
Green Chillies - 2 finely chopped
Yogurt - 2 tbsp
Oil - 2 tsp plus 1 cup for frying the vadai
Water - Enough to form firm dough

Preparation:


1. Heat the oil in the frying pan on medium high heat. Mix all the dry ingredients together and add curry leaves, cilantro and ginger to it. Mix well and add two tsp of oil to it.

2. Add yogurt and give it a mix. Add water a little at a time and bring the mix together to form a dough.

3. Make quarter cent balls and flatten it and make a hole in the center. Fry the vadai's and serve it with chutney or ketchup.


We often make rotis for lunch or dinner and it always comes in circle shape. My daughter gets excited when I make her triangle roti's ...

We often make rotis for lunch or dinner and it always comes in circle shape. My daughter gets excited when I make her triangle roti's and so I was wondering about a square roti. Looks like there is such a roti that already existed and people make them often. They stuff the rotis sometimes with eggs, veggies or sprinkle sugar or spicy powders and make them. They resemble the triangle roti and has many layers of dough in each bite which adds a different texture and taste to the roti. For lunch today, I made square rotis for my daughter and enjoyed them with stuffed eggplant an mutter paneer.


Gadgets:

Rolling Pin
Iron Griddle
Spatula
Board
Measuring Spoon


Ingredients:

Prepared Roti Dough - 2 lemon size balls
Ghee - 1 tbsp
Whole Wheat Flour - a few Tbsps for making rotis

Preparation:

1. Take one portion of the dough and dab in a little bit of the whole wheat flour. Start to roll out the dough to 5 inch circle . Spread some ghee just enough to cover the roti roughly.

2. Fold the edges from two opposite side. Make sure that the folds touch each other. You will have a rectangle shape. Fold the other two sides to form a square.

3. Dab some flour and roll our the roti so that you maintain the square shape.

4. Place the rolled roti on the heated tava and cook on both sides. Remove from heat and spread some ghee and serve them hot.


It feels so awesome to blog after all these months. Today, my daughter wanted to have a tea party and invited her cousins over. Since my n...

It feels so awesome to blog after all these months. Today, my daughter wanted to have a tea party and invited her cousins over. Since my nephew has allergies, we had to make something special that he would enjoy at the tea party. His favorite cookies are the ones made from all natural cookie mix from Cherrybrook Kitchen (you can find at Target). My daughter made this cookie and I decided to document it. The cookie was good for being allergy free and had the nutty flavor from ghee. Next time you have a party and need to provide gluten free cookies, please give this one a try. Super easy to prepare and tastes delicious.


Gadgets:

Bowl
Measuring Cups and Spoons
Baking Sheet lined with Parchment Paper or Foil
Whisk
Spatula

Ingredients:

All Natural Cherrybrook Kitchen Brand Sugar Cookie Mix - 1 box
Rice Mix - 1/4 Cup
Vanilla Essence - 2 1/2 tsp
Warm Melted Ghee/ Earth Balance Dairy Free Butter - 1/2 cup

Preparation:


1. Set the oven to 350 degrees F.

2. In a bowl, measure out the liquid and mix well with a whisk.

3. Add the cookie mix and bring the dough together with a spatula.

4. Make a square and cut them into cubes.

5. Take each portion and make a ball and lightly flatten them and place on the lined baking sheet.

6. Bake for  12 to 15 minutes or until the corners are lightly browned. Remove from sheet allow to cool and store in an air tight container.

Back to blogging after a while. Just got a first hand experience of having my blog being hacked. It was crazy. Initially I had no clue as ...

Back to blogging after a while. Just got a first hand experience of having my blog being hacked. It was crazy. Initially I had no clue as to what was happening to the blog. After great thought I decided to log into the admin page and to figure out what was happening. For some reason one post got over 50,000 visitors in a day and that was odd to start with. If you see this happening to your posts keep an eye on it, remove the post for sometime and maybe that will help.Also changing your pass word is what really matters to protect your computer and your blog. I contacted google and I do not know if they fixed it for me or something magical happened, my blog was fine yesterday.

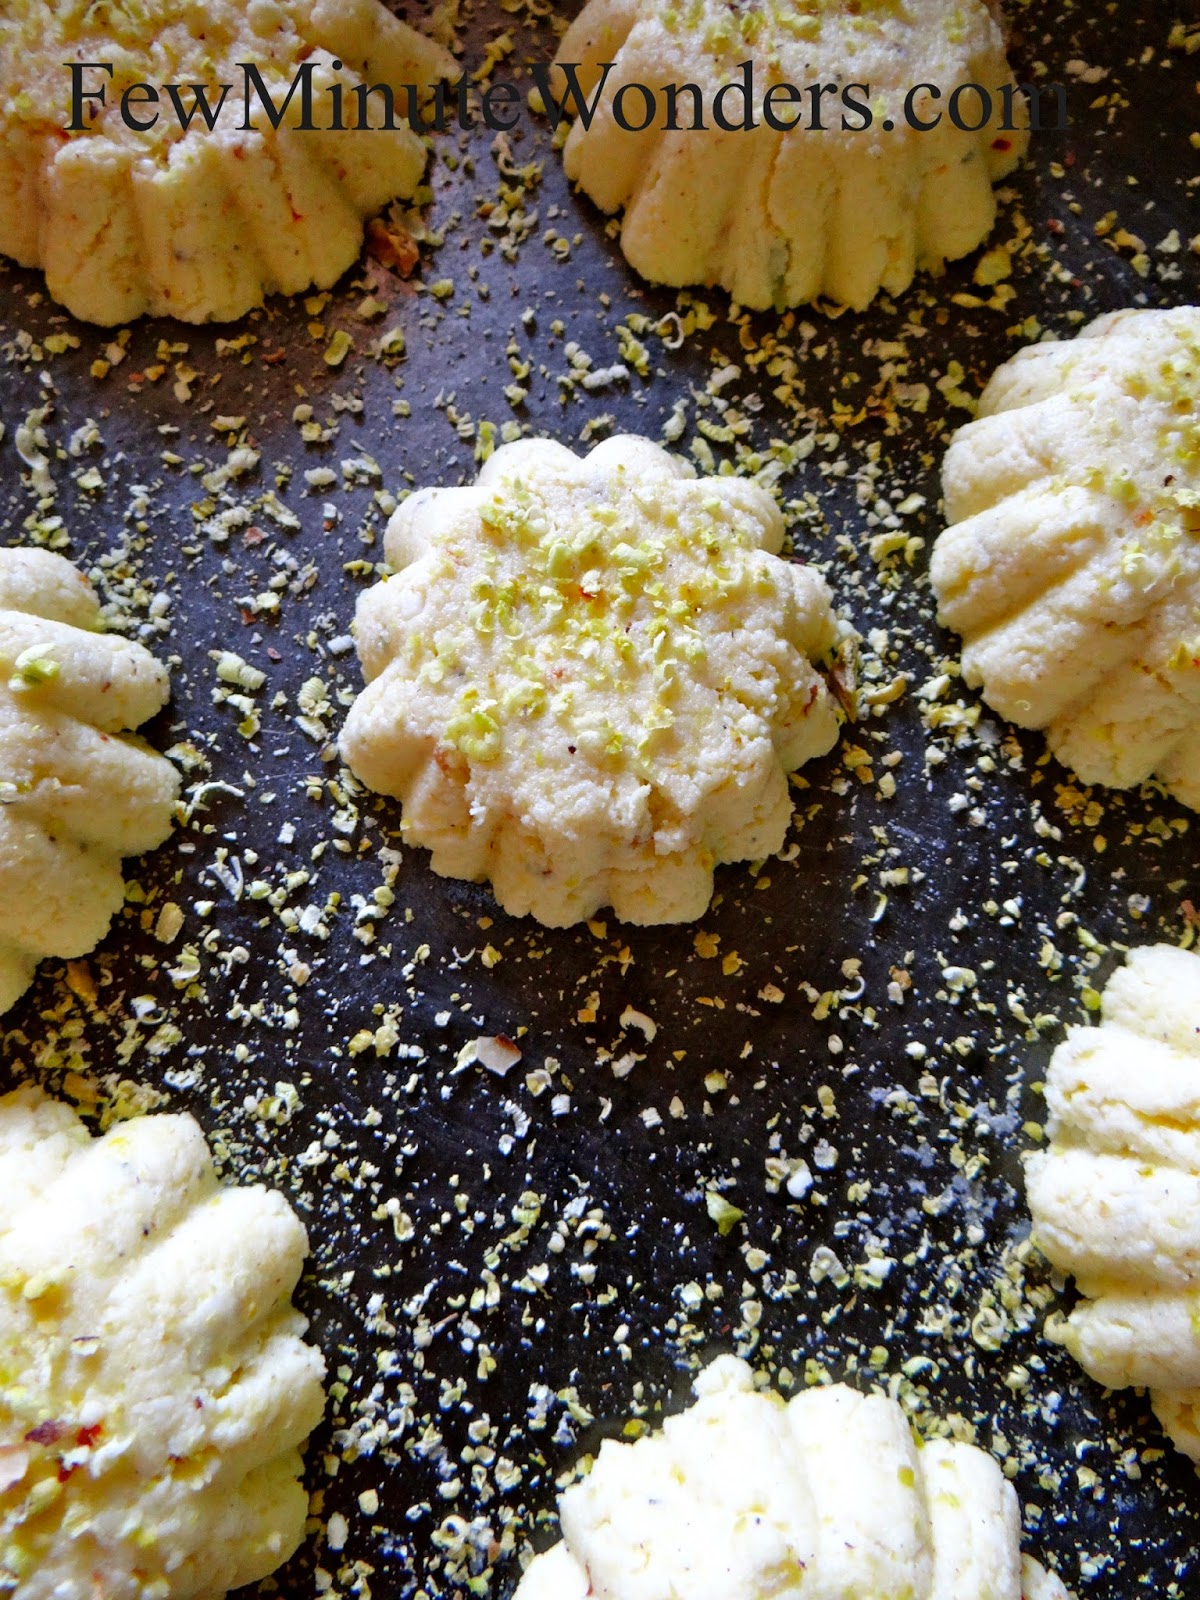
Anyways, I made this sandesh to celebrate the comeback of my blog. It is such a relief I must add to be able to share what I love creating. The recipe is from my family folder, my aunt Saroja manni gave it to me 6 years ago and I found it when I was looking through my recipes. A simple sweet very special to me and super easy to make. For all those milk sweet lovers, here is one Bengali sweet for you to prepare. 


Gadgets:

Frying Pan
Spatula
Measuring Cups and Spoons
Grater

Ingredients:

Freshly Prepared Paneer - 1 cup
Sugar - 3 tbsps
Cardamom - 3 pods powdered
Saffron - a generous Pinch
Pistachios - a few

Preparation:


1. Heat the stove to medium heat. Add fresh paneer, sugar and mix well. Allow it to cook for 10 minutes until all the liquid and wetness disappears.

2. Add saffron and cardamom powder and mix well.

3. Allow to cool, using your palms take a small portion of the sandesh and roll it within your palms, until they form a smooth ball. Press it into mini tart mold to form shapes.

4. Grate pistachios and place them in the fridge in an air tight container for the sandesh to set before serving.