- Very healthy recipes from the kitchen to the table in minutes

It feels so awesome to blog after all these months. Today, my daughter wanted to have a tea party and invited her cousins over. Since my n...

It feels so awesome to blog after all these months. Today, my daughter wanted to have a tea party and invited her cousins over. Since my nephew has allergies, we had to make something special that he would enjoy at the tea party. His favorite cookies are the ones made from all natural cookie mix from Cherrybrook Kitchen (you can find at Target). My daughter made this cookie and I decided to document it. The cookie was good for being allergy free and had the nutty flavor from ghee. Next time you have a party and need to provide gluten free cookies, please give this one a try. Super easy to prepare and tastes delicious.


Gadgets:

Bowl
Measuring Cups and Spoons
Baking Sheet lined with Parchment Paper or Foil
Whisk
Spatula

Ingredients:

All Natural Cherrybrook Kitchen Brand Sugar Cookie Mix - 1 box
Rice Mix - 1/4 Cup
Vanilla Essence - 2 1/2 tsp
Warm Melted Ghee/ Earth Balance Dairy Free Butter - 1/2 cup

Preparation:


1. Set the oven to 350 degrees F.

2. In a bowl, measure out the liquid and mix well with a whisk.

3. Add the cookie mix and bring the dough together with a spatula.

4. Make a square and cut them into cubes.

5. Take each portion and make a ball and lightly flatten them and place on the lined baking sheet.

6. Bake for  12 to 15 minutes or until the corners are lightly browned. Remove from sheet allow to cool and store in an air tight container.
Back to blogging after a while. Just got a first hand experience of having my blog being hacked. It was crazy. Initially I had no clue as ...

Back to blogging after a while. Just got a first hand experience of having my blog being hacked. It was crazy. Initially I had no clue as to what was happening to the blog. After great thought I decided to log into the admin page and to figure out what was happening. For some reason one post got over 50,000 visitors in a day and that was odd to start with. If you see this happening to your posts keep an eye on it, remove the post for sometime and maybe that will help.Also changing your pass word is what really matters to protect your computer and your blog. I contacted google and I do not know if they fixed it for me or something magical happened, my blog was fine yesterday.

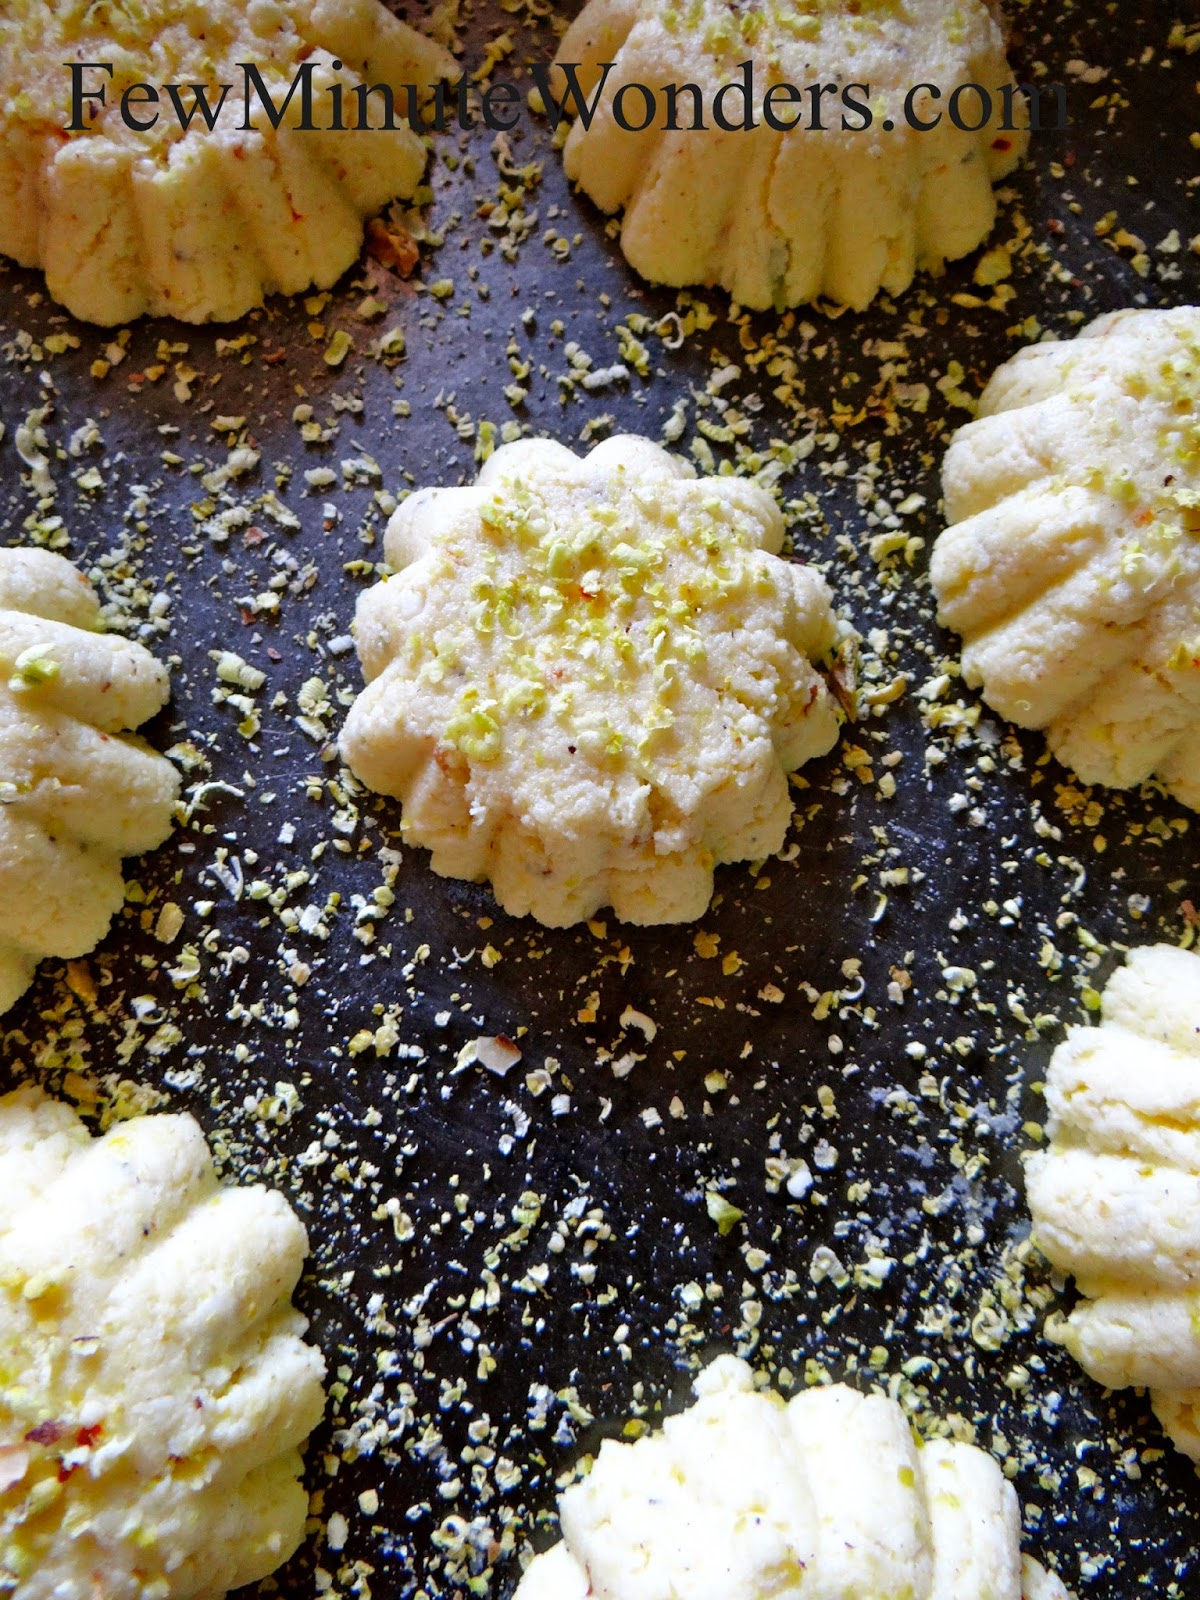
Anyways, I made this sandesh to celebrate the comeback of my blog. It is such a relief I must add to be able to share what I love creating. The recipe is from my family folder, my aunt Saroja manni gave it to me 6 years ago and I found it when I was looking through my recipes. A simple sweet very special to me and super easy to make. For all those milk sweet lovers, here is one Bengali sweet for you to prepare. 


Gadgets:

Frying Pan
Spatula
Measuring Cups and Spoons
Grater

Ingredients:

Freshly Prepared Paneer - 1 cup
Sugar - 3 tbsps
Cardamom - 3 pods powdered
Saffron - a generous Pinch
Pistachios - a few

Preparation:


1. Heat the stove to medium heat. Add fresh paneer, sugar and mix well. Allow it to cook for 10 minutes until all the liquid and wetness disappears.

2. Add saffron and cardamom powder and mix well.

3. Allow to cool, using your palms take a small portion of the sandesh and roll it within your palms, until they form a smooth ball. Press it into mini tart mold to form shapes.

4. Grate pistachios and place them in the fridge in an air tight container for the sandesh to set before serving. 

I remember having this kozhambu often as a child. Amma would always make this as we all loved it in our household. It is like vathal kozha...

I remember having this kozhambu often as a child. Amma would always make this as we all loved it in our household. It is like vathal kozhambu with garbanzo and bits of coconut. They often make this kozhambu either using senai kazhangu/elephant foot yam or eggplant. I enjoy having dishes prepared with senai and since I found frozen senai at the local Indian store, I was elated and have already made it twice. The last time I made it I documented it and decided to share it on the blog. 


Gadgets:

Measuring Cups and Spoons
Cutting Board
Knife
Wok
Spatula
Bowls


Ingredients:

Garbanzo Beans - 1 cup cooked
Coconut - 1/4 cup cut into small thin bits
Senaikazhangu - 1 packet Frozen
Salt
Sambar Powder - 2 tsp
Tamarind - 1/2 a lime size
Curry Leaves - a few
Gingily Oil -1 tbsp
Mustard Seeds - 1 tsp
Fenugreek Seeds - 1/2 tsp
Asafoetida - a small bit
Water - 4 cups
Jaggery - a pinch

Preparation:


1. Take some warm water in a bowl and add the tamarind to it. Prepare the tamarind juice and set it aside.

2. Cut open a coconut and thinly slice the coconut into bits and set aside.

3. Heat the wok with some oil, add asafetida, mustard seeds, fenugreek seeds, dry red chillies. Allow the mustard seeds to pop. Add curry leaves, frozen senai and mix well on high heat.

4. Add the sambar powder, and mix for a few seconds. Add tamarind water  and salt. Bring this liquid to a boil. Add the garbanzo beans, coconut pieces and allow it to reduce. Serve it with hot rice and a side vegetable.

5. Incase you have to make a larger quantity, after the liquid reduces a little, take a few tsps of rice flour, mix with a few tbsps of water and pour it into the kozhambu. Allow to cook and you will see that the liquid will start to thicken.


Sometimes, we plan on making certain things for dinner and then our plans go through the roof. So the vegetables that we plan on using for...

Sometimes, we plan on making certain things for dinner and then our plans go through the roof. So the vegetables that we plan on using for that dinner remains unused. Such was the case last week. I had the eggplant, swiss chard and some potatoes that needed to be used. So the next day for dinner, I decided to roast the eggplant and potatoes and add the swiss chard to make a subzi which we all enjoyed with rotis. 


Gadgets:

Baking Sheet
Foil
Wok
Spatula
Measuring Spoons
Cutting Board
Peeler


Ingredients:

Organic Red Potatoes - 4 Peeled and cut into chunks
Eggplant - 1 Large into big chunks making sure every piece has skin on one side
Organic Swiss Chard - 1 Bundle cut into think ribbons.
Dry Red Chilies - 2
Cumin Seeds - 1 1/2 tsp
Mustard Seeds - 1 tsp
Turmeric Powder - 1/4 tsp
Asafoetida Powder - 1/4 tsp
Salt to taste
Oil - 2 tbsp


Preparation:

1. Make sure the the oven rack is inserted to the second level in the oven. Set the oven on broil high.

2. In a baking tray, add the chopped potatoes and eggplant. Drizzle a tbsp of oil and broil for 10 minutes. By this time the top of the veggies must appear golden brown and roasted.

3. Gently flip the veggies using a flat spatula and broil the other side for another 6 minutes. Remove from the oven.

4. Add 1 tbsp of oil to the pan. Add mustard seeds, allow it to crackle, add asafoetida, chilies and cumin seeds. Add the swiss chard and cook until the swiss chard starts to wilt.

5. Add the rest of the broiled veggies, salt and mix well with the swiss chard. Allow it to cook on medium low for a few minutes, and serve them hot with roti, rice etc.

To go with the karuvepalli kozhambu  I made paruppu thogayal. Traditionally, paruppu thogayal is always made with thoor dal, but I was out...

To go with the karuvepalli kozhambu I made paruppu thogayal. Traditionally, paruppu thogayal is always made with thoor dal, but I was out of thoor dal. Checking out my pantry cupboard I found moong and channa dal and decided to use them in the preparation of thogayal.  Soon I started roasting the mixed dal and making the thogayal. I was kind of curious as to how the thogayal was going to turn out. To my pleasant surprise the thogayal turned out really delicious and one did not miss out on the taste of thoor dal in it. Next time you are facing a " lack of thoor dal in the pantry" situation, give moong and channa dal a shot in preparing thogayal.


Gadgets:

Blender
Spatula
Measuring Spoons and Cups
Wok

Ingredients:

Moong Dal - 1 cup
Channa Dal - 1 cup
Coconut ( dry or fresh) - 1/4 cup
Dry Red Chillies - 2
Asafoetida - a small bit
Salt
Oil - 2 tbsp
Water - Enough to grind into a thick paste


Preparation:

1. Heat the wok with oil. Add asafoetida, red chillies and dal and roast on medium heat until the dal turns golden brown and the aroma of the dal can be smelt.

2. Place the dal mix in the blender and grind to a thick paste with enough water.

3. Serve on the side with karuvepplai kozhambu and rice. 

With Amma visiting, we always start making very healthy and traditional recipes. Amma always loves medicinal vegetables and makes sure tha...

With Amma visiting, we always start making very healthy and traditional recipes. Amma always loves medicinal vegetables and makes sure that it is incorporated into the diet. Some months ago my sister called me to find out the easy version of the karuvapillai kozhambu that Amma used to make. I told her I had no clue and she told me that I need to blog it next time because it very delicious. So this time my Amma helped me make this kozhambu and I loved it. It was super easy and I loved the saucy texture of the kozhambu. It paired very well with moong and channa dhal paruppu thogayal. 


Gadgets:

Blender
Wok
Measuring Cups and Spoons


Ingredients:

Curry Leaves = a big fist full
Whole Black Pepper = 1 1/2 tbsp
Tamarind - 1 small lemon size
Dry Red Chillies - 1 
Asafoetida - a small bit
Water - 1 1/2 cup
Salt
Mustard Seeds - 1 tsp
Fenugreek Seeds - 1/4 tsp
Ginjili Oil - 2 tbsp
Jaggery - a pinch


Preparation:

1. Add curry leaves, pepper, chilies, tamarind, asafoetida and water in a blender and make into a fine paste.

2. Heat the wok with oil. Add mustard and fenugreek seeds, as soon as the mustard seeds pop add the paste along with some salt.

3. Bring the sauce to a boil and you will see it thicken in a few minutes, add jaggery and mix well. Serve it over hot rice. 

For a change for dinner instead of making the same old chapathi , I decided to make dosti roti. Dosti roti is made by rolling two portions...

For a change for dinner instead of making the same old chapathi , I decided to make dosti roti. Dosti roti is made by rolling two portions of dough, stacking it one on top of the other with a thin layer of ghee in-between and rolling it out into a single roti. When the roti gets cooked on both sides it gets puffs up and roti can be easily pulled apart into two individual rotis that are super think. I found that it was best when eaten hot off the taw a with some delicious side dish.


Gadgets:

Rolling Pin
Bowl
Tawa
Spatula
Measuring Cups and Spoons


Ingredients:

Whole Wheat Four/ Atta - 1 cup
Salt
Oil - 1 tbsp
Warm Water - Enough to make a soft dough
Ghee - 2 tbsp


Preparation:

1. Divide the dough into four equal parts. Divide each of this portion into two equal parts.

2. Roll out two portions into a 4 inch circle. Spread some ghee on one roti and place the other roti on top of it. Roll the dough into a 8 inch circle.

3. Heat the tawa and place the roti and cook evenly on both sides.

4. Remove from heat, separate the rotis into two equal parts, spreading some ghee keeps it moist and flavorful.
Serve it hot with your favorite side dish. 

A very fast dish to serve or carry to any potluck is puli sevai. It gets done under 15 minutes and is always popular among adults and kids...

A very fast dish to serve or carry to any potluck is puli sevai. It gets done under 15 minutes and is always popular among adults and kids. With ready made rice sticks available in our grocery stores, it becomes very easy to prepare it in a jiffy. Sometimes, when we travel and we do not store vegetables at home for use on our return, these rice sticks become very handy. For dinner I made puliyodharai sevai  as per my daughters request. 


Gadgets:

Stock Pot with a lid
Spatula
Colander
Measuring Cups and Spoons

Ingredients:

Gingelly Oil - 2 tbsp
Peanuts - 1/2 cup
777 Puliyodhari Paste - 2 tbsp
Curry Leaves - a few
Water - 1/2 stock pot
Rice Sticks - 1/2 packet

Preparation:

1. Bring water to a rolling boil in the stock pot. Add salt and the rice sticks. Allow it to boil for a few minute. Turn the heat off and cover the pot with a tight lid. Drain after 5 minutes.

2. Heat the saucepan with oil. Fry the peanuts and add the curry leaves.

3. Add the puliyodhar paste and mix well. Turn the heat off and add the rice sticks and mix well, serve hot with some yogurt or raita.


I was looking through my cook books and I found my diary of recipes. I had some of these recipes copied from my sister in law,Renu Manni. ...

I was looking through my cook books and I found my diary of recipes. I had some of these recipes copied from my sister in law,Renu Manni. She always made interesting food and it always inspired me to learn from her. She let me have some of her recipes and this is one of them. I used to like this peas masala a lot and decided to make it for dinner. I served it over quinoa and bhindi fry which was very comforting. It goes well with roti's, naan and any rice preparation.


Gadgets:

Blender
Cutting Board
Knife
Frying Pan
Spatula

Ingredients:

Green Peas - 2 cups Soaked overnight and Pressure cooked with salt and water to 1 whistle.
Onions - 2 onion chopped
Tomatoes - 2 roughly chopped
Ginger - 1 inch grated
Garlic - 3 pods finely minced
Tamarind - small lime soaked in 2 cups of water
Turmeric Powder - 1/2 tsp
Chilli Powder - 1 tsp
Coconut - 1/4 cup
Coriander Seeds - 1 tbsp
Cumin Seeds - 1 tsp
Cinnamon Sticks - 2 inch sticks
Cloves - 3
Salt to taste
Oil - 1 thsp
Cilantro


Preparation:

1. Heat the pan with 1 tsp of oil. Add coriander seeds, cloves, cumin seeds, cinnamon and told until you smell the flavors from the spices and seeds. Add the 1 onion and cook before adding the coconut. Blend to a paste.

2. Heat the pan again and add 2 tsp of oil and add the onions, ginger and garlic. Cook until it starts to brown. Add the blended paste, along with chili and turmeric powder and mix well. Cook for 5 minutes covered.

3. Add the mix to the peas in the pressure cooker. Add salt and tomatoes, cover and pressure cook on medium low to a whistle.

4. Garnish with cilantro to garnish and serve it hot.


A new year is born and the festivities include making some traditional food items to celebrate the new year. Apart from the traditional pay...

A new year is born and the festivities include making some traditional food items to celebrate the new year. Apart from the traditional payasam and vadai, a manga pachadi with vepampoo is made to make us realize that life can be sweet, salty, spicy and bitter and we need to accept all in life. This recipe is super special to me because it was given to me last new year by a very special person. It is very important for me to have this documented and shared in my blog for everyone to prepare and enjoy.

                                         Happy( Jaya) New Year!


Gadgets:

Mandolin
Sauce Pan
Seasoning Wok
Measuring Spoons and Cups
Spatula


Ingredients:

Raw Mango - 1
Water - 2 Cups
Jaggery -  1 1/2  cups
Salt
Oil - 1 tsp
Mustard Seeds - 1 tsp
Dry Red Chillies - 1
Dried Neem Flower - 2 Tbsp


Preparation:

1. Cut the mango into wedges. Using a mandolin thinly slice the mango into slices. Add water , a little salt and allow it to cook. 

2. When the mango slices start to disintegrate, add powdered jaggery ( sediment free kind) and cook for a few minutes. The sauce will start to thicken. Remove from heat.

3. Heat the seasoning wok with oil. Add mustard seeds and chillies allow it to crackle. Add dry neem flowers, allow it to get dark brown and add it to the pachadi.


Though it is spring time here, the weather has suddenly turned very hot. It feels like summer almost and I wanted to have yogurt rice wit...

Though it is spring time here, the weather has suddenly turned very hot. It feels like summer almost and I wanted to have yogurt rice with a pickle for dinner. My daughter wanted some pickle and since I was out of all pickles. I happen to borrow a cookbook from my sister in law a week ago called "Ellorum Sappada Vanga". It contains a lot of traditional south Indian recipes of Mrs. Jayalakshmi Ramachandran that is very well documented in Tamil by Pujashri Mathioli Saraswathi. I happen to look through the recipes and I liked the idea of carrot thokku. Decided to make it for my daughter. Super easy to make and absolutely delicious. I had it mixed with rice and also with curd rice. Loved the natural sweetness from the organic carrots, the heat from all the spices and salty nature of the pickle.


Gadgets:

Blender
Wok
Spatula
Measuring Spoons and Cups
Grater

Ingredients:

Organic Carrots - 3 grated ( Use fine grater, it works better I think than the one I used)
Gingily Oil - 3 tbsp
Asafoetida - a penny size 
Fenugreek Seeds - 1 1/2 tsp
Salt to taste
Turmeric Powder - 1/2 tsp
Red Chili Powder - 1 tsp ( add more if you can handle more spice)
Mustard Seeds - 2 tsp
Tamarind - lemon size soaked in 2 cups of water. I used Joy tamarind pulp - 4 tsp in water.


Preparation:

1. Dry roast the asafoetida and fenugreek seeds and powder. 

2. Heat the wok with oil, mustard seeds and allow them to crackle. Add the grated carrots, salt, turmeric powder, salt and chilli powder. Mix well and cook the carrot well. 

3. Add the tamarind water and cook until all the water disappears and the carrots all gets mushed up and get to a thooku consistency. 

4. Add the powdered asafoetida and fenugreek seeds and mix well. The oil will start to leave the carrot. Remove from heat, allow to cool and store in a bottle for a few days.

If there is one thing that I will enjoy everyday, its rasam. Its is very comforting to mix rasam with rice on any given day. I think if yo...

If there is one thing that I will enjoy everyday, its rasam. Its is very comforting to mix rasam with rice on any given day. I think if you can make a good rasam you have comforted many people and the taste will always linger in their memory. I make rasam often but I have not been able to document for blogging. A good rasam recipe is something to treasure. On Monday for dinner I made lemon rasam and I was able to at last document it for blogging. The perfect season to make lemon rasam as you can find some awesome lemons and limes in the market. A great thing to have when you have a stuffy nose or when your sinus flares up. Also you need not have rasam powder or tamarind to make this rasam.


Gadgets:

Saucepan
Seasoning Ladle
Measuring Cups and Spoons
Cutting Board
Knife


Ingredients:

Lemon/Lime - juice of 1 ( might need more if the lemons are not tart enough)
Green Chillies - 2
Ginger - 1 tbsp finely chopped
Tomato - 2 chopped into chunks
Cilantro - 2 tbsp minced
Curry Leaves - a few
Ghee - 1 tbsp
Mustard Seeds - 1 tsp
Asafoetida Powder - 1/2 tsp
Cumin Seeds - 1 tsp for seasoning and 2 tsp finely powdered
Pepper - 2 tsp whole finely powered
Turmeric Powder - 1/2 tsp
Salt to taste
Moong Dhal - 1/4 cup cooked
Water - 4 cups
Jaggery - a pinch

Preparation:

1. Heat the saucepan with 2 tsp of ghee. Add green chillies, curry leaves and ginger. Add turmeric powder and chopped tomatoes give it a mix. Add water and bring it to a boil of medium heat.

2. Add cumin and pepper powder, 1/4 tsp of asafetida powder, salt and allow it to cook for 3 to 5 minutes.

3. Add the moong dhal and cook until it starts to froth. Add lemon juice, and jaggery.


4. Check to see if the lemon/ lime juice is tangy enough or else add 1/4 to 1/2 tsp of juice.

5. Heat the seasoning ladle with the remaining ghee. Add asafetida, mustard seeds, allow them to pop and then add cumin seeds. Remove and add it to the rasam. Add cilantro for garnish and serve hot with rice or as an appetizer.