- Very healthy recipes from the kitchen to the table in minutes

This tomato chutney was born out of misunderstanding a recipe. For some reason I thought this is how my mother in law prepared the chutney...

This tomato chutney was born out of misunderstanding a recipe. For some reason I thought this is how my mother in law prepared the chutney and found out in the end that it was something totally different. Anyways, I shared this recipe with my sister and she was really impressed that I decided to share with you all. I make it often these days because it has become very popular in my household. I make it sometimes with Tukas tomato paste, sometimes with regular tomatoes and sometimes I mix tukas and tomatoes together. I can assure you that whatever method you use, the results always produce very taste chutney.


Ingredients:

Heavy bottom vessel
Cutting board
Knife
Measuring spoons and cups
Blender/Mixer


Ingredients:

Tomato - 4
Tukas tomato paste - 2 tbsp ( if you do not have the paste substitute it with 2 tomatoes)
Onion - 1 large 
Garlic - 2 pods
Dry chillies or green - 2 
Cilantro - a  tbsp chopped 
Turmeric Powder - 1/2 tsp
Salt
Asafoetida - 1/4 tsp 
Mustard Seeds - 1 tsp
Channa Dhal - 1/4 cup
Udad Dhal - 1/4 cup
Oil - 1 tbsp


Preparation:

1. Heat the oil in the wok. Add the channa and udad dhal and roast until they are golden brown. Remove and dhal and place them in a cup.

2. Add to the remaining oil asafoetida and mustard seeds. When the mustard pops add green chillies, garlic and onions. Cook the onions well. 

3. When the onions are done add tukas paste mix well with the onions and then add the tomatoes, turmeric powder, salt and allow to cook.

4. Once the tomatoes are well done allow to cool. Add them to a blender along with the roasted dhal and grind them into a chutney and garnish with cilantro.

Aviyal is a side dish that is delicious and is very common to South Indian cuisine.The dish is very simple to prepare and goes well with r...

Aviyal is a side dish that is delicious and is very common to South Indian cuisine.The dish is very simple to prepare and goes well with rice, sambar, rasam or adai ( lentil crepes). A mixture of vegetables cooked with yogurt, coconut and chillies is a true comfort food to most people from that region. Each family has its own recipe. It differs mainly in the kind of spices added..This avial recipe comes from my mother in  law Mrs.Pushpa Yegneswaran's  kitchen. I have made it often and decided to document it. 


Gadgets:

Cutting Board
Knife
Measuring cup and spoons
Spatula
Blender
Heavy bottom vessel


Ingredients:

Vegetables ( potato, raw banana(vazhakkai), carrot, beans, egg plant, Sweet pumpkin, Winter pumpkin, Drum stick) cut thin and even - 5 cups
Fresh coconut - 1/2 coconut grated
Chillies (red or green ) - 1 ( add more for spice)
Yogurt - 2 cups
Salt
Coconut oil - 1/2 tsp
Curry leaves- a few

Preparation:

1. Cook the veggies in a heavy bottom vessel with some salt.
2. Grind the coconut, chillies with a little yogurt into a paste.
3. Add this paste to the cooked veggies and allow to cook for 5 minutes.
4. Add the yogurt on top and mix well.
5. Heat the coconut oil in a spoon, ad curry leaves and add it to vegetable mix. Serve it hot with rice.

With with end of school year programs, summer vacation and travel blogging took a back seat for me. I have been trying to post about pav b...

With with end of school year programs, summer vacation and travel blogging took a back seat for me. I have been trying to post about pav bhaji for some time and at last was able to take the photos to post it. Pav Bhaji is the easiest to serve for over 100 people or 4. A month ago I made them for more than 200 people for a yoga retreat and 10 year anniversary celebration. It was just a perfect street food to have on a cold night in La Jolla, Ca. One always wonders how much to prepare to serve 100 people. Typically 2 rectangle (larger) or four, 4 quart aluminum trays would serve 100 people. Once the veggies are chopped and all the prep work is done, believe me its super easy to prepare the pav bhaji with a help of a pressure cooker or Ipot.


Gadgets:

Pressure cookers
Cutting Board
Knife
Onion Choppers
Aluminum Trays - 4 (4 quart) or 2 Rectangle
Wok
Spatula
Measuring Cups and Spoons


Ingredients:

Potato - 1 (4 quart) tray pealed and chopped chunky
Onion - 1 ( 4 quart ) tray finely chopped plus 1/4 tray for topping (white onions or brown onions)
Bell Peppers ( red, yellow, green, orange, red) - 1/2 (4 quart) tray chopped
Tomato - 1/2 (of 4 quart) tray
Cauliflower - 3/4 (of 4 quart ) tray
Peas and Carrots - 1/4 (quart) tray
Garlic - 3 bulbs chopped
Ginger - 4 inches grated
Cilantro - 3 bunches plus 3 cups of chopped for topping
Tomato Paste (tukas) - 1/2 cup
Kasthuri Methi - 4 tbsp crushed
Green Chilies - 2 chopped roughly ( seeds removed)
Shah Jeera (Cumin Seeds)- 1 tbsp
MTR Pav Bhaji Masala - 5 tsp ( add more for more spice)
Red Chili Powder - 1 tbsp
Salt
Turmeric Powder - 1/2 tsp
Water - 1/4 of the pressure cooker/ Ipot plus more ( 2 cup)
Butter - 2 tbsp for Bhaji
Chilled/ Frozen Butter - 1/4 inch cubes for garnish.

Preparation:

1. In a pressure cooker add potato, cauliflower, carrot, peas, bell pepper,green chilies, water and salt.   Pressure cook on medium low to 4 to 5 whistles.

2. In a big wok add oil and shah jeera. Allow it to splatter. Then add onions, ginger and garlic and cook well. Add tomato paste and tomato and cook well. Add chili powder, turmeric powder, pav bhaji masala, kasthuri methi and cook on low heat until the masala is well incorporated.

3. Once the pressure releases on the cooker add it to the onion tomato mix and mix well. With a masher or electric hand blender roughly. Add cilantro and sugar and butter . Taste for salt etc and store away in aluminum trays or 3 crock pots and serve them hot with butter toasted bun or pav.

4. Top the bhaji with green chilies, fresh cilantro, raw onions, a small cube of frozen butter and slice of lemon.Serve with Pav.

I realized that for most people apart from the taste of food and appearance of food, the texture of food is very important. Quinoa has a ...

I realized that for most people apart from the taste of food and appearance of food, the texture of food is very important. Quinoa has a nutty taste, has a texture of a crunchy grain but smells a little to me like poppy seeds or kasa kasa. When most rice eaters try it, they will not consider it as an alternative to rice.They might have great resistance to it because the distinct smell is kind of strong.Though I have known and used quinoa a lot, I still did not use it as a perfect substitute for rice.

 But all that changed when my sister served me quinoa with onion sambar and potato curry. I was sold. All the smell disappeared and the texture was similar to rice and actually tasted good. Thanks to Indian cooking that has a great smell killer Asafoetida. It is so over powering that it takes away any mild or subtle smell. I have been using quinoa as a substitute for rice and I love it. I have made payasam, puliodharai, lemon and yogurt quinoa, had it with rasam, kozhambu and sambar. I am so glad that it cooks like rice in a rice cooker and tastes great. A very healthy alternative to rice especially for those who have blood sugar issues. 

Today I made Thair/Yogurt Quinoa for dinner and we loved it. Cannot ask for more on a very hot day.The yogurt, onion and cucumber will totally cool your system. A perfect alternative to regular yogurt rice. Next time you have people over for lunch or dinner give this one a try.


Gadgets:

Pan with lid
Bowl
Rice Cooker
Cutting Board
Knife
Measuring Cups and Spoons
Spatula

Ingredients:

For Making Quinoa:
Organic Quinoa (from Costco) - 1 cup
Water - 3 cups plus 1 1/2 cups for rice cooker

For Yogurt Sauce:
Yogurt - 2 1/2 cups 
Milk- 1/2 cup
Oil- 1 tbsp
Mustard Seeds - 1 tsp
Cashew Nut - 8 (optional)
Salt
Green Chillies- 1 (deseed to reduce spice)
Asafoetida powder - 1/8th tsp
Curry Leaves - a few
Cilantro - 2 tbsp chopped
Persian Cucumber - 2 diced into small cubes
Ginger - 1/2 tsp grated
Onion - 1 diced into small cubes


Preparation:

1.  In a rice cooker add 1 1/2 cups water. Plug it in and allow the water to warm up.
2. In a bowl add quinoa and wash it well. Add 3 cups of water to the quinoa and place this bowl in the rice cooker and allow the quinoa to cook.


3. In a pan, add oil and when it warms up add asafoetida, and mustard seeds. The mustard seeds will pop so cover it with a lid. When it is done popping add cashew nuts, greens chillies, curry leaves, onions, ginger and salt. Cover and allow it to cook on low heat for a few minutes. The onions will turn translucent. Remove from heat and allow to cool.
4. When the quinoa is done remove the bowl and spread it out in a plate and allow to cool.
5. Add the cooled quinoa to a bigger bowl, add milk, yogurt, cucumber, cilantro and mix well. Add the onion mix and mix well. Taste and add salt if required. Serve it cold or at room temperature with pickles, grapes or cooked veggies. 

The first time I tasted Shrikhand I was 7 years old. My cousins friends came home one day and made us Gujarati food. I was so used to my c...

The first time I tasted Shrikhand I was 7 years old. My cousins friends came home one day and made us Gujarati food. I was so used to my comfort food of paruppu sadham(lentil with rice) and Rasam ( soup) that I was surprised to taste sugar in everything they prepared. Shrikhand was sour and sweet to me, which was very strange to my young palate. But all that changed by the time I finished my high school. Vandhu's  ( my friend) mom always made it and I thought it was delicious. Though it is usually served with puri's I just like to scoop some in my table spoon and slowly lick them to enjoy the smooth texture of the Shrikhand melting in my mouth. 


Gadgets:

Paper Towel (Viva Brand) or Cheese cloth
Bowls
Spoon
Measuring Cups and Spoons
Colander

Ingredients:

Greek Yogurt - 12 oz
Sugar - 3 to 4 tbsp 
Cardamom - 2 pods
Saffron - a few strands
Milk -1 tbsp
Camphor - a tiny pinch


Preparation:

1. Place the yogurt in a cloth or towel and hang it as shown below or drain through the colander.

( I had a lot of fun preparing this. It is kind of hard if you want to hang the yogurt in the paper towel or cloth. Where do you hang it? Not sure that I have a great spot to hang the yogurt bundle I had to get creative. As they say "Necessity is the mother of invention". I used the microwaves door as shown on the right. It worked. I then remembered that I had a colander and tried using that and it turned out to be very effective.)


2. About 1/3 cup water would drain out of the yogurt. Remove the yogurt from the cloth/paper towel and add sugar, powdered cardamom, camphor and mix well.

3. Warm 1 tbsp of milk and add saffron to it. Soak for 10 minutes and then add it to the yogurt. Mix well and transfer into a container and place it in the fridge for it to set.

4. Serve it cold with puri's or as dessert.

Seriously! what was I thinking, Mohan Laddu a very traditional sweet ladoo made with wanton wraps. I confess that I did not actually decid...

Seriously! what was I thinking, Mohan Laddu a very traditional sweet ladoo made with wanton wraps. I confess that I did not actually decide on creating any ladoo to start with. I was trying to make samosa's with different types of wraps and I got a packet of wonton wraps for that. I did not like the samosa's made with them. I made the samosa's with tortilla's and there was some oil remaining. Looking at the wantons I thought it would be good to fry them and use them in chat mix. While I was frying my daughter wanted me to make her a special sweet snack. I looked at the wantons and thought it must be fine with some sprinkled sugar. I gave it to her and I tasted a tiny bit of that. It reminded me of something I used to enjoy, Mohan laddu.

Traditionally it is made with rava or cream of wheat dough rolled out into discs or tortillas and deep fried. It was then powdered coarsely with some sugar and made into ladoos. Looking at all these wantons in my bowl I had a change of heart and I decide to make my favorite Mohan Laddu which was ready in minutes.


Gadgets:

Blender/Mixie
Bowl
Spatula
Measuring cups

Ingredients:

Fried wanton wraps(egg less ) - 30 ( Makes 3 - 4 cups powdered)
Sugar - 3/4th cup to 1 cup( according to taste)
Cardamom - 2 pods
Roasted cashews - a few (optional)


Preparation:

1. Coarsely powder the wantons and remove 1/2 of it and place it in a bowl.

2. Grind the remaining half with sugar and cardamom into a very fine powder .The powder will all stick together because of the oil in it.

3. Mix it with the coarse mixture, nuts and make into balls or ladoo's.

I t took me a long time before I realized that Ground nuts as we call them in India, Peanuts as we call it everywhere, kadalai or Molakott...

It took me a long time before I realized that Ground nuts as we call them in India, Peanuts as we call it everywhere, kadalai or Molakottai in Tamil is very comforting and nostalgic snack. My Amma used to love peanuts especially the kinds we find in Coimbatore, Tiruppur and Erode areas.The peanut brittle or burfi, peanut balls or regular roasted peanuts were all extra crunchy and tasted very fresh in that regions. The oil content in the nuts are subttle and it was my Amma's  comfort food especially when she had a lot in her mind to ponder. 


As much as I loved peanuts roasted or boiled  as a kid, I did not think of it as a comfort snack growing up. But as an adult especially after I came to the U.S I really started to enjoy peanuts especially, the Gem brand peanut ladoo's from the Indian store a lot. I think Gem brand is made in Coimbatore and every time I popped one into my mouth it reminded me of home and my Amma, hence a emotional and comforting attachment. Today, on Mother's Day I thought it would be appropriate for me to blog about something that is a comfort snack for me and my Amma. Happy Mother's Day to all the mother's in the world.

Gadgets:

Pressure Pan
Colander

Ingredients:

Raw Peanuts with Shells- 4 cups ( or as much as you would like to cook)
Water - Enough to cover the peanuts
Salt - add as much to get the water taste  very salty


Preparation:

1. Add the peanuts, water in the pressure pan.

2. Add salt so that your water tastes very salty.

3. Pressure cook on medium high to 4 whistles.

4. When the pressure releases open the pressure cooker and enjoy some verkadali or boiled peanuts.

This recipe is something that my friend Geetha shared with me during her stay in San Diego some years ago. It is simply surperbe with idie...

This recipe is something that my friend Geetha shared with me during her stay in San Diego some years ago. It is simply surperbe with idies or dosas. I know you will all be curious reading the title, her recipe calls for no sambar powder and all the spice is from three types of chilies: green chilies, red dry chilies and chili powder. The trick is in adding it at different stages of the sambar making process. This sambar is a little different from the regular sambar. It is slightly watery and hence perfect for dunking soft idlies or crunchy dosai. A very easy and quick sambar to make at any time. If you are in a mood for a different type of sambar please give it a try.


Gadgets:

Pressure Pan
Cutting Board
Knife
Heavy Bottom pan
Spatula
Measuring Spoons and Cups
Masher

Ingredients: (Makes about 2 1/2 quart Sambar)

Note: Please vary the amount of chilies as your requirement).
Thoor Dhal - 1 cup
Water - 5 cups or more (depends on the dhal)
Turmeric Powder - 1/2 tsp
Green Chilies - 1/2
Chilli Powder - 1 tsp
Salt
Mustard Seeds - 1 tsp
Udad dhal - 1 tsp
Dry chilies - 1
Asafoetida - a few shakes
Curry leaves - a few
Cilantro - 2 tbsps chopped
Onion - 1 big
Small Onions/ Shallots - 1 cup
Tomatoes - 3
Ghee - 2 tsps heaped


Preparation:

1. Wash the thoor dhal well and add it to the pressure pan along with 4 cups of water, green chilies, chopped tomatoes and turmeric powder. Cook it to 4 whistles so as to get them cooked well.

2. In the mean while, heat up the pan add ghee, asafoetida, mustard seeds allow the seeds to pop, add red dry chilies and udad dhal.

3. When the udad dhal turns golden brown add small onions, chopped big onions, curry leaves and a little salt and cook the onions well.

4. Once the pressure is realized in the pressure pan, open and using a masher mix the tomatoes, dhal and green chilies well to resemble  a soupy texture. Now add the red chili powder and cook the dhal mix well for 5 minutes with some additional water.

5. Add the dhal mix to the cooked onion mix and allow it to cook on medium heat, check for salt, add cilantro and serve it hot with dosai or idli.

Note: They taste best the next day as the onion, chilies and spices are well infused.

I have been meaning to post this recipe for a while but did not feel the need to do so. This is another version of the recipe that I have ...

I have been meaning to post this recipe for a while but did not feel the need to do so. This is another version of the recipe that I have already posted here. The recipe has evolved over the years and months and now I can make this sweet closing my eyes and it turns out perfect all the time.The only major difference in taste is with the use of pine nuts, it does creates magic. It was by accident that my sister Latha created it. She was in a hurry to make her sweets for Deepavali and forgot to add milk powder which was required in the recipe. She said it tasted better than the one with the milk powder. Once I tasted it I was so hooked on it. Made it a zillion times ( you know I am joking right!) but it has been perfect every single time and these days I don't care to measure. Its one of those sweets where you can never go wrong, after all every ingredient that is added is tasty. The perfect last minute sweet to make which can be served warm or cold when you have a unexpected guests. I have two versions here, one with pine nuts and the other with coconut.


There was no reason for me to use the coconut because, I love it with nuts. But, my friend was disappointed that she could not taste the one with nuts(allergies) while her whole family were going ga ga over it. It was just my test run last weekend, and since my whole family is so addicted to the one with nuts we felt coconut was not as good as the nut one. True, there is a lot of fat in nuts and sure they make everything taste good. Not too happy with the outcome, I closed the lid over the glass bowl pushed it into the fridge. After two days I opened it and guess what, we have a new reaction to the same sweet. It tasted very nice, maybe not as good as the nuts but still good enough. So I was all excited and decided to blog about it because I know there are lot of people looking for nut free sweets. The perfect post for Priya's Cooking With Seeds Event: Cardamon

Gadgets: ( Same for both recipes)

Microwave
Microwave safe glass container (preferably a rectangle /square one)
Spatula
Measuring Cups and Spoons
Parchment paper
Prepared Square or Rectangle Baking Pan
Knife
Blender /Nut Chopper
Wooden Mold : I know a lot of you have been mentioning the wooden mold. I don't know if it used only for kalakand. I was in the check out counter at North Park Produce in San Diego and found these wooden molds. I guess someone must have decided not to add them to their cart. I looked at it, thought it looked very interesting and as I like to use wood a lot I picked it up for a dollar and a half. I had put them away and happen to find them yesterday and decided to use it to mold kalkand.


Ingredients: (For With Pine Nuts Recipe)

The use of Pine nuts and Ricotta Cheese takes it from being a core Indian sweet to an Italian dessert.
Condensed Milk - 1 can
Cream of Wheat/Coarse Rava/ Fraina - 1/2 cup
Pine Nuts - 1 cup chopped coarsely ( If you do not have pine nuts use cashews only)
Sugar - 1/4 cup
Butter - 3 tbsp
Ricotta Cheese - 15 oz
Cardamon Pods - 2


Ingredients: (For With Coconut )
Condensed Milk - 1 can
Cream of Wheat/Farina/Coarse Rava - 1/2 cup
Coconut - 1/2 cup ( fresh or frozen if very coarse use the mixer and blend them a little before use)
Sugar - 1/4 cup
Butter - 3 tbsp
Ricotta Cheese - 15 oz
Cardamon Pods - 2


Preparation: (For both recipes)

1. In a microwave safe container add the first ingredient and second ingredient mix well before adding the rest of the ingredients but, do not add cardamon to the mix.

2. Place it in the microwave (Very important to be aware of the power of your microwave) and cook for 5 minutes ( if you are not sure about the microwave's power cook in 3 minute increments).

3. Remove and mix well and put it back in the microwave. cook it for another 5 minutes remove and mix. Then reduce the time and cook it for 3 minutes twice taking care to mix each time in between. At the end of the 16 minutes you must be able to see the mix all coming together and no trace of moisture. If you make a small ball with the mix it must form easily and not stick.

4. Transfer the mix to a baking pan lined with parchment paper spread evenly, cut it with a knife into cubes and allow to cool and store in the fridge. This can be served warm or cold.

Samosa, the memory of eating them goes back to my school days. The canteen sold mini or cocktail samosa's which were so amazingly crunc...

Samosa, the memory of eating them goes back to my school days. The canteen sold mini or cocktail samosa's which were so amazingly crunchy and stuffed with onions, something i could never get enough of. Its been a while since I got to taste some crunch until I happened to have Surati Farsan's samosa.

If you live in L. A area or San Diego, you must have visited Surati Farsan. A popular fast food place in town located in Black Mountain Road in the Little India Shopping Complex. I am one of those people who tend to eat there at least once a month. The reason being, their crunchy samosa. It is such a treat for me that whenever I am asked what I would love to eat I would say SF samosa with chole.

In spite of all of such positive association with samosa's I have always had a mental block in trying to make them at home. Maybe, I tend to opt for baking or broiling a lot more than deep frying. Deep frying for me has to be only for special occasions like Deepavali when I make murukkus. Other than that I deep fry only when I know I can use up the rest of the oil by frying appalam, vadam or some vathal. I feel very strongly about reusing oil or throwing it. I decided to go past my mental block and venture into making samosa's at home. I consider this recipe a few minute wonder because if you have some left over cooked veggies (dry) then you can use them and create a totally new snack. 


Gadgets:
Wok for frying
Spatula
Cutting Board
Knife
Bowl
Paper Towel
Colander

Ingredients: ( Makes 8 Samosa)
Multi grain tortilla - 4 (regular size)
Oil as required for deep frying
Oil - 2 tbsp for cooking the filling
Onion - 1 finely cut into mini cubes
Peas - 1/2 cup
Carrot - 1/2 cup
Paneer - 1 cup cut into mini cubes
Mustard Seeds - 1 tsp
Cumin Seeds - 1 tsp
Chili Powder - 1 tsp (more for spice)
Turmeric Powder - 1/4 tsp
Asafortida - a few shakes
Salt to taste(I used 1/2 tsp)
Sugar - a pinch
Cilantro - 1 tbsp chopped
Ginger - 1 inch grated
Garlic - 3 cloves
Curry leaves - a few
Lime juice - a dash
Water a bowl for getting the tortilla moist


Preparation : Stuffing / Filling:
1. Heat 2 tbsp of oil in the heavy bottom vessel and when that heats up add mustard seeds and allow for the seeds to start popping before adding cumin seeds.
2. Add the ginger, garlic and onions and cook with 1/4 tsp of salt. Once they are transparent add chilli and turmeric powder and mix well before adding peas and carrots.
3.When they are cooked add the paneer,sugar, curry leaves,a dash of lime juice and cilantro and mix well.
4. The end product must be a dry filling. Allow to cool.


Preparation Of Samosa: (Makes 8 Samosa's)


1. Take the tortilla and cut it into two even halves. 


2. Using your fingers spread water over one half. This makes the tortilla moist and stick proof.
3. Place the tortilla in such a way so that the semi circle is facing out.


4. Fold the tortilla as shown in the picture and make sure they are glued well with water.Please press to fuse the two layers.


5. Fill the veggie paneer filling taking care not to over fill so as to break the seams that were glued. 


6. Taking care to see that the tip of the cone is completely fused roll the tortilla as shown in the picture.


7. Spread  water in the end of the tortilla and seal it well to form the perfect samosa shape. 


8. Check to see that all the edges are glued well. Make the remaining 7 samosas.


9. Heat the oil on medium high for a few minutes. Pop in a piece of the tortilla and if it surfaces up immediately than the oil is ready for the samosas to be fried.


10.Fry your samosa's and enjoy them with ketchup, sweet and spicy chutney.

The latest in Costco bread isle is the multi grain tortillas. I was really not too thrilled to buy them but I looked at the ingredients i...


The latest in Costco bread isle is the multi grain tortillas. I was really not too thrilled to buy them but I looked at the ingredients in regular flour tortillas and I reverted back to the multi grain one. What surprised me was that I kind of ended up liking it a lot more than I expected. You would not miss the flour tortilla once you have tasted it. It does not get tough when cooked and tastes great. It is my entry to My Food Finds Event for the month of May.
Generally quesadillas are filled with cheese or some veggies, but this is what I make when I have some left over chutneys. It is a perfect midnight snack while watching a movie or television, a quick midday meal when you have no breathing space and need  to eat something within minutes or an after school snack for kids. I know most of you are thinking what coconut chutney and cheese on tortilla, believe me it tastes very good and the chutney flavors with a cilantro garnish makes it yum especially when it is hot. It was what I had  for lunch this afternoon. 

Gadgets:
Tava or griddle
Spatula
Spoons
Knife
Cutting Board

Ingredients:
Multi-grain tortilla -2
Coconut chutney - a few tbsp
Mozzarella cheese - to your requirement ( I used this cheese because that was what was available in my fridge)
Cilantro - a few leaves for garnish

Preparation:
1. Evenly cook the two  tortillas on both sides.
2. Spread the cheese and allow the cheese to melt on one tortilla.
3. Spread the coconut chutney on the other.
4. Cover the cheese tortilla on top of the chutney and cut into wedges, garnish with cilantro and eat them hot.

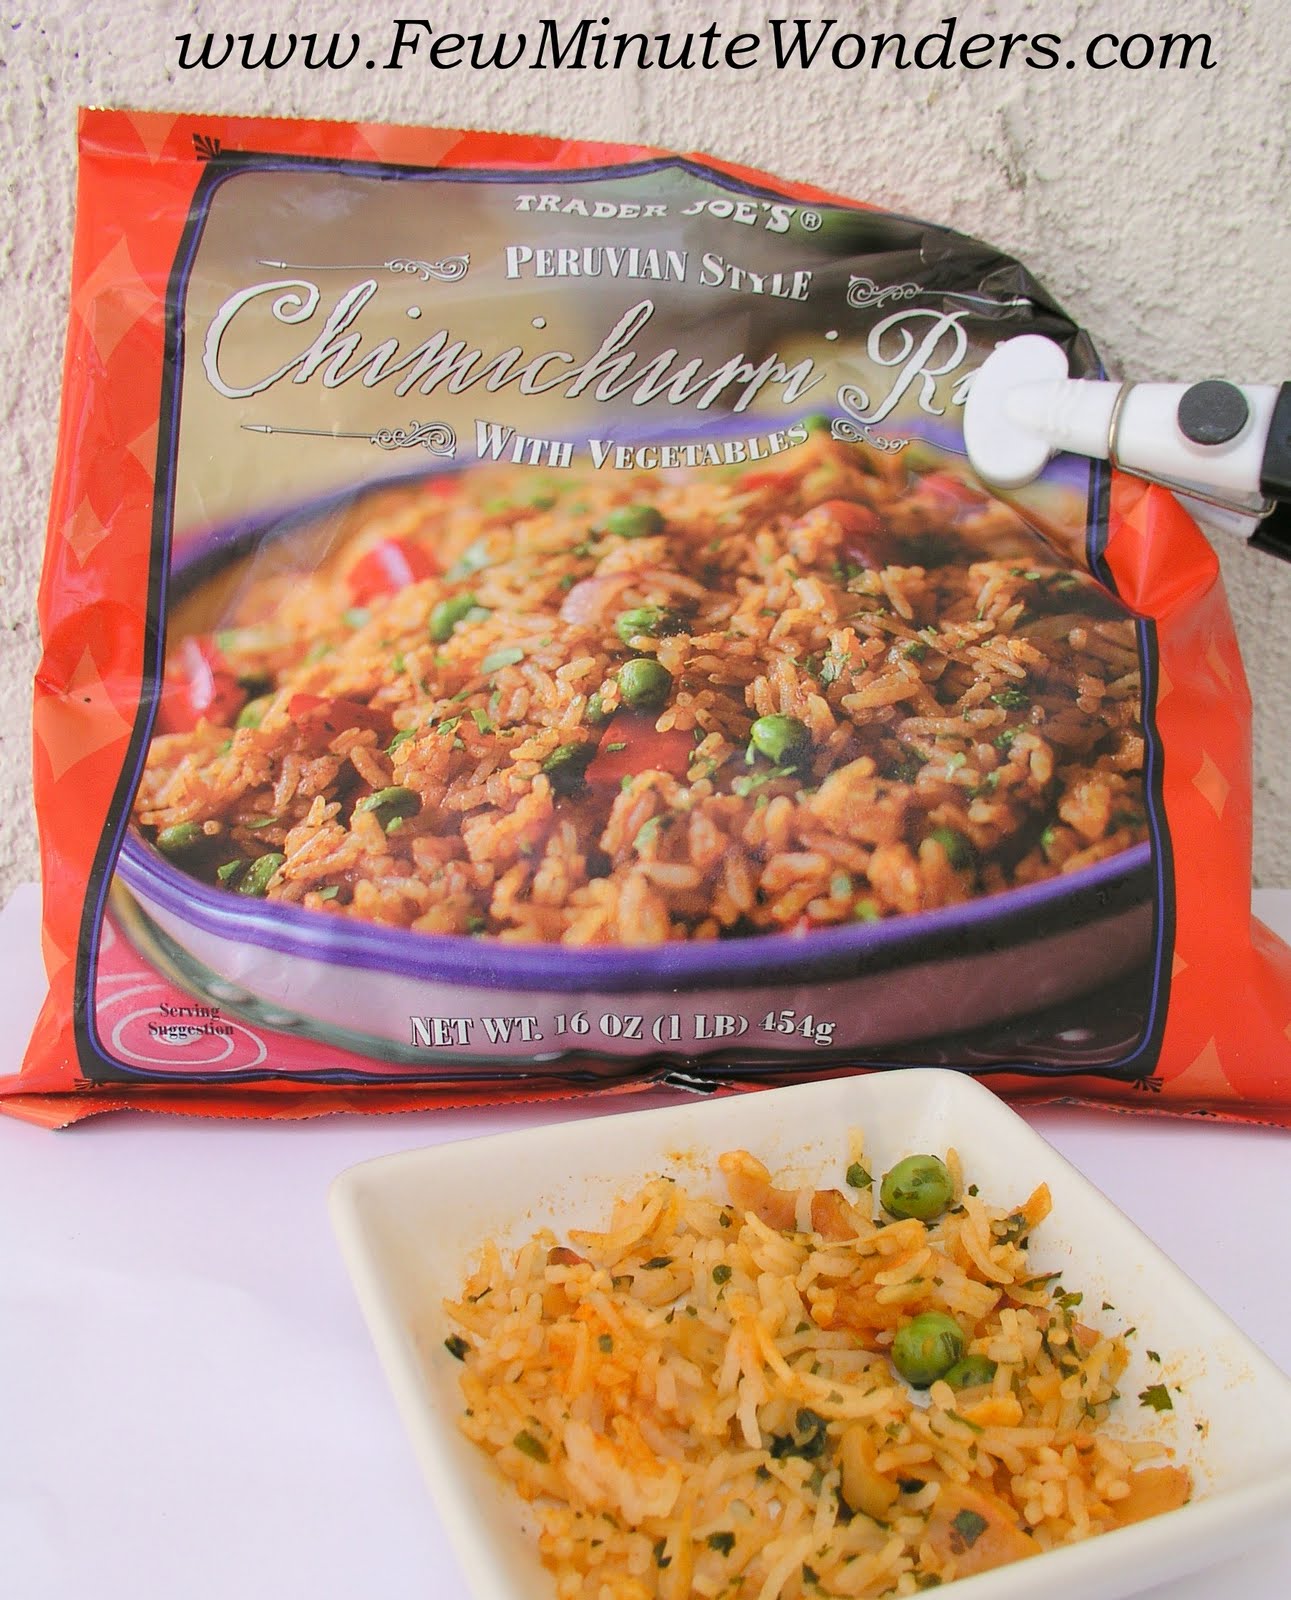
E ver since I tasted the Peruvian Chimichurri Rice that Trader Joe's carries, I have been thinking of trying to make it at home. I lov...

Ever since I tasted the Peruvian Chimichurri Rice that Trader Joe's carries, I have been thinking of trying to make it at home. I love this rice because it tastes like tomato rice plus lemon rice with a whole lot of cilantro but without any of the seasoning like mustard seeds or dhals. It also had this silent sweetness and a tangy spice to it, that is so delicious and makes me crave for more. I have bought this rice a number of times from TJ's and simply did not get enough of it.

Deciding that I need to know how to make it I googled and found that they do not have a recipe for Peruvian rice. There was lot of mentions on chimichurri. sauce, rubs, paste etc which is very popular ingredient in the  South American cuisines. They use it a lot to marinate meat. I even found chimichuri sauce and powder at World Market and decided to try the powder. It had a lot of dried parsley and had no cilantro flavor. So, I did the simple thing of buying a packet of the rice and checked out the ingredients. I found that they used panca   Chillie, a chillie that is very commonly used in Peruvian cuisine. Went hunting for that chillie in the grocery stores but it was not commonly available.

Came home and set to work. I heated portions of my store bought chimichurri rice and kept tasting it to add my own spices. I think it was close to the original, if anyone who reads this post knows how to make the chimichurri rice like the one at Trader Joe's please send me a mail. If you have not tasted it please grab a packet at TJ's and enjoy it. If you liked what you tasted then try the recipe and please send me your review. If you live in San Diego area and know where you can find panca peppers please let me know.


Gadgets:
Cutting Board
Knife
Bowl
Heavy Bottom Stock pot / pan
Spatula
Measuring cups and spoons


Ingredients:
Basmathi Rice - 1 cup
Water - 2 cups
Onion - 1 small ( 1 cup)
Shallots - 1/2 cup
Roma Tomato - 1(firm and large)
Ginger - 1 inch grated
Garlic - 3 big cloves
Lime juice - 1 1/2tsp
Peas - 1/2 cup
Cilantro - 1 cup finely chopped
Chili Powder - 1 tsp (add more if you want it spicy and substitute any kind of latin chillies that you have)
Salt - less than a tsp
Creme Fraiche- 1/4 cup ( Sour Cream/ fresh cream can also be substituted)
Fried Onions - 2 tbsp (optional)
Butter - 1 tbsp
Olive Oil - 2 tbsp ( not extra virgin)


Preparation:
1. Soak the rice for 20 to 30 minutes in 2 cups of water after washing it well.
2. In the stock pot add butter and oil together. When that heats up add onion, garlic and ginger with 1/4th tsp salt and cook it on medium heat.
3. When the onions change color add a roma tomato, peas, chillie powder and cook with the onions, then add peas after the tomato is cooked a little. Add 1/4  cup creme fraiche and mix it well with the veggie mix. It will generate a lot of liquid. Cook until all the liquid disappears.
4. Add the water from the soaked rice and bring it to a boil. Then add the rice and mix well.Add 1/2 tsp of lime juice and allow the rice to cook until all the water is almost absorbed.
5. Lower the flame to simmer and cover the pot and cook the rice for 4 minutes. Then add the cilantro, fried onions and mix it gently and serve it hot with any side dish.